Share:

Showing posts with label night photography tutorials. Show all posts

Monday, May 2, 2022

Private Night Photography Workshops by Royce Bair


Private Night Photography Lessons in the Field. For years I've done up to 10 group workshops a year. These 5-day group workshops typically cost about $1,995 (or about $400 a day). In 2019, I went into semi-retirement, doing only one group workshop a year (my group workshops often fill up in 48 hours or less). For the rest of the year, I only do private workshops. Private instruction allows greater flexibility for teaching and offers many additional opportunities for my clients! We can sometimes do as much photography in two or three nights than you can do in a group situation during four or five nights. Of course, we can also do as much daytime photography as you want (depending on how much sleep you require).

One of the biggest advantage of a private workshop is that my time is shared only with you and the friend(s) you choose to attend with you (I cannot tell you how many times I have seen one "bad apple" in a group workshop try to monopolize my time at the expense of others in the group).

Private instruction is only a little more expensive than a group workshop, but it can actually be equal to or less expensive, when you invite a friend or two to share the costs. A maximum of three photographers are allowed in a private group (you and up to two of your friends). Let me illustrate...

Day rate: I charge $1,200 for the first day of instruction and $950 for each additional day (some photographers book just one day). "Weather" days are $500. Here's a typical fee cost EXAMPLE for two or three photographers:

 1st Day/night .......... $1,200.00
 2nd Day/night ..........    950.00
 3rd Day/night ..........    950.00
                          ---------
   Total fee cost ....... $3,100.00
   Cost/photog (when 2).. $1,550.00
   Cost/photog (when 3).. $1,033.33
   (This is less than $345/day!)       

Definitions: A "Day/night" of photography includes up to 8 hours of my time in guiding and teaching. At least two (2) of those hours will be doing starry night photography. The daytime instruction can be in the field or in the classroom (i.e. image post processing). A tag-along spouse or friend, without a camera, is not considered a "photographer".

Weather Days: In many of the workshop I've ever conducted, there are nights where we have so much cloud cover that few stars can be seen or photographed. Although we always try to make good use of the night with "Blue Hour" photography and demonstrating light painting (or Low Level Lighting) techniques, this is probably not what you signed up for. When this happens in my private workshops, we just call it a night and rest up for better nights. If I cannot give you at least 30 minutes of starry night photography, I will charge you a flat $500 fee to cover my expenses for that day. Note: This "weather day" discount does not apply to the first day. The "weather day" discount is also NOT something I offer in my group workshops.

Travel Expenses: You will cover your own travel expenses for transportation, lodging and meals.

Locations for private workshop lessons can be any place in the world! Any workshop location within 350 miles of my residence includes my travel expenses in the first day rate fee. Examples of workshops that are within this 350-mile radius: Arches National Park, Grand Teton N.P., Yellowstone N.P., Zion N.P., Bryce Canyon N.P., Capitol Reef N.P., Canyonlands N.P. and Grand Staircase-Escalante N.M.

You will also cover my travel expenses for any workshop that is greater than 350 miles from my residence in Salt Lake City, Utah. I will cover my own lodging and meals. For distances greater than 350 miles, you will be charged the following travel expenses, in addition to my day rates:

 351-800 miles (car travel one 
    way): $0.95 per mile*
 Over 800 miles: Actual airfare
    charges + actual car rental
    fees (we can share this
    vehicle).
   
*Example: One of my favorite places in eastern California are the Alabama Hills, near Lone Pine. From this area, you can also visit Mono Lake and the ancient Bristlecone Pines. Google says it's 582 miles from Salt Lake City to Lone Pine —that's 232 miles over my free base distance of 350 miles. At 95 cents per mile, that would be a travel expense of $220. As for your own travel expenses, you would want to fly into Las Vegas and rent a car for driving to Lone Pine (232 miles).

Reserving your date: I charge a $300 deposit to reserve a date. You can reserve up to a six days at a time. There is a deposit fee of $300 for each day you wish to reserve. This one deposit covers all the photographers in your group. I am happy to help you with your travel arrangements and hotel recommendations.

CALL: 801-558-2701 to make your reservations, or EMAIL me at royce.bair[AT]gmail[DOT]com (to prevent spam email, I ask you to substitute the "[AT]" with the "@" symbol and the "[DOT]" with the "." character).

Final payment: I request the balance of my fees (and any travel expenses) 90 days prior to the starting day of your private workshop.

Cancellations and Refunds: You can cancel and receive a full refund (less credit card fees), up to 90 days prior to the event. If you cancel between 60 and 89 days prior to the event, I will refund all but $100.00 of the fees you have paid. If you cancel between 30 and 59 days prior to the event, I will refund 50% of your fees, unless we can find a replacement attendee to take your place. If you cancel less than 30 days prior to the event, none of your fees will refunded, unless we can find a replacement attendee to take your place. The workshop participant acknowledges that if Royce Bair cancels this event, all fees paid will be refunded. Other than this refund, no guarantee or warranty is given or implied.

Eliminating days from your scheduled event: If, after completing at least two of your reserved workshop days, it is decided that you no longer need one or more of your additional reserved days, you will be refunded up to $450.00 for each of those unused days (less credit card processing fees). Travel expenses cannot be refunded.

Extending your workshop: If we are less than two weeks away from your workshop, and you wish to extend the length of the workshop (and I can make arrangements to do so), you will pay my first day rate ($1,200/day) for each additional day. You may also be required to pay my lodging expenses for any extra days (as last-minute lodging costs are often at a higher rate).

Recommendations: Read what others have said about my workshops.


PRIVATE INSTRUCTION: In addition to private workshops, I also offer:

This is currently priced at $75.00/hour. Please text me at 801-558-2701 or email me at royce.bairATgmailDOTcom for details.


My photography expertise goes beyond astrophotography: three decades of full-time magazine and commercial photography.


Monday, February 8, 2016

Dave Morrow: Night Sky Photography On the Edge of Reality

"Sometimes Things Get Complicated" ~ a panorama composed of 11 images ~ Photo by Dave Morrow
 Night Photography is a completely new field to Dave Morrow. Looking at his portfolio, It's hard to believe that he took his first shots of the Milky Way only two months ago!

Editor's Note: This feature is an update on a post I did about Dave back in October 2012.

"I have always been a huge fan of the subject," says Dave. He looked at thousands of pictures of the night sky, which made him want to create something completely different from everyone else.

"Night Tremors" ~ Ruby Beach on the Olympic Peninsula ~ Photo by Dave Morrow
 Two months ago, Dave was headed to the North Cascades to shoot Picture Lake and overheard someone talking about the meteor showers that night. After shooting the sunset he laid out and waited for the stars. His first shot was a bit dark, and the ISO was to low, but after messing around for about 10 minutes he managed to get something he really liked.

"When I got home from my first shoot and upload the picture onto my computer, I had no clue how to process this beast of an image," reports Morrow.  He decided to experiment and see what happened. As he moved different sliders around in Lightroom, some great colors start to come out in the image, so he decide to run with it, and the rest is history.

"When Worlds Collide" ~ Photo by Dave Morrow
Free Tutorial: Dave's star photography has been so well received on the Internet, he has produced a free tutorial and a set of inexpensive Lightroom presets to help others interesting in this type of night photography:
Challenges: Dave's biggest challenge in this new style of star photography is trying to come up with some cool stuff in the foreground to keep his shots interesting. "Finding new compositions that keep people coming back for more is a huge challenge that will continue to grow as I take more shots," remarks Dave.

"Shoot Me to the Stars" ~ Mt. Rainier from Sunrise Point ~ Photo by Dave Morrow
Favorite Equipment and Tools: Morrow's favorite piece of photographic equipment is his Nikkor 14-24mm f/2.8G lens. "Shooting super wide angles at fast apertures is key to star photography, and this thing handles it like a beast," whips Dave.

Number two has got to be the Nikon D800 which he feels seems to have a star photography “sweet spot” of ISO 5000. "I have never seen a camera handle ISO 5000 like this one does," reports Dave.

Number three would be his Really Right Stuff Tripod. Extending to 72 inches tall is a huge advantage when shooting the night sky for hours, due to the fact that he can look up at his camera without slouching over. The rest of his gear can be found here on his website.

And because the moon is a Milky Way photographer's worst enemy, Dave uses The Photographer's Ephemeris to know when the moons rises and sets (and how bright/big it will be on any given night), as well as the times of the sunrise and sunsets. He also uses a free light pollution map (by Blue Marble). Other tools are mentioned in his online tutorial. (Editor's Note: If you live in the continental United States, another great light pollution map is the Dark Sky Finder mention in our 12 September 2012 blog post.)

On the Edge of Reality: "Escaping people, and at times reality has always been something I enjoy now and then. In order to get good dark skies for stars photography you must do both of these things," says Dave. Adding somewhat philosophically, "So it works out well!"

More of Dave Morrow's photography can be found at his website. Dave also has a Free Learn Photography eCourse.


Friday, January 3, 2014

How to Photograph Milky Way NightScapes

"Milky Way Rainbow" - a panorama of 5 vertical images - Grand Teton NP ~ © Royce Bair (click to enlarge)
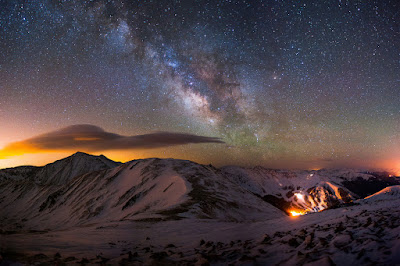
This night photography blog contains a wide variety of nocturnal photography styles and features the work of many other photographers. However, just for today, I'm going to focus on Milky Way photography, and a style I've developed, called "NightScapes".

"NightScape" Definition: Starry night skies as points of light, with an interesting landscape feature that is light painted just enough to enhance recognition. Not all my my NightScapes have light painting, but many do; and that light painting often comes from moonlight or starlight via a second exposure.

Points of Light: Although I love star trails, the stars in my NightScapes are photographed the way you see them: as points of light, not trails via long exposures. My technique requires short exposures of 30 seconds or less. It also requires higher image sensor speeds (usually 3200 ISO and above), and fast lenses (f/2.8 or faster). The best results come from high-end DSLR cameras, but good images can also be made on a low budget.

NightScape "Recipe": A step-by-step recipe for taking NightScapes is freely given here on my blog. Phil Hart has also written an ebook about "Shooting Stars" that is very helpful for beginners. My recipe and the ebook will help you get started. David Kingham's new NIGHTSCAPE ebook will increase your starry night skills even further. Studying and following this blog will help you take NightScapes to a higher level, and improve the quality of your images. For even better results, I recommend taking one of my workshops.

Photographing the Milky Way: In every workshop I've ever taught, my students enjoy shooting the stars, but their real satisfaction comes from photographing the Milky Way. For many of my attendees, it is the not only the first time they have done this, but it is often the first time they have seen the Milky Way with their naked eyes —especially in such a dramatic and unpolluted state.

Royce Bair has been a magazine photographer, international lecturer, and workshop instructor for over two decades. He has photograph for magazines i.e. The Smithsonian and National Geographic (both hard copy and online). Some of his workshop attendees have returned multiple times and their testimonials speak for themselves.

  Thor's Hammer, Bryce Canyon NP - Double Arch, Arches NP - Delicate Arch, Arches NP
© Royce Bair (click to enlarge)

Milky Way over Teton Range & Jackson Lake ~ © Royce Bair (click to enlarge)
Milky Way over The Watchman - Zion N.P. ~ © Royce Bair (click to enlarge)
Milky Way over Grand Canyon - Nankoweep area ~ © Royce Bair (click to enlarge)
Milky Way over Teton Range from Cascade Canyon Overlook ~ © Royce Bair (click to enlarge)
 Milky Way views over Teton Range, Jenny Lake and String Lake ~ © Royce Bair (click to enlarge)


Tuesday, December 3, 2013

Night Photography Instruction: workshops, events, and books

The following is a list of night photographers who offer workshops, events, instruction, books, and tutoring on night photography. Please contact the editor (Royce Bair - at my email address) if you have information for this list:

Mike Pach
    Website • Email • Telephone: 719-260-6637
    Paint Mines Night Photography Workshops near Calhan, Colorado
    
Paint Mines Interpretive Park

Robert Arn
    WebsiteContact
    eBook: Photography At Night: An Introduction To Astrophotography on a Budget
    PDF Downloads: Free Tutorials and Presentations

From "Inexpensive Astrophotography for the Beginner" ~ a free tutorial by © Robert Arn

Royce Bair (Editor of this blog)
    WebsiteEmail • Telephone: 801-558-2701
    Workshops & free events: NightScape Photography meetup schedule

Royce's "NightScapes" Video demo ~ © Royce Bair

Alister Benn
    Website (on Google+)
    eBook: "Seeing the Unseen" - How to Photograph Landscapes at Night

"Solid Air" (used on his eBook cover, "Seeing the Unseen") ~ © Alister Benn

Mike Berenson
    WebsiteEmail • Telephone: 888-460-8880
    Night Photography Workshops: Colorado, Utah, & Arizona
    Night Photography Blog: "How To" Articles & Tutorials, Product Reviews & more

Lake Irene's Milky Way Mirror

Brad Goldpaint
    WebsiteContact
    Workshops: 2013 schedule for on location workshops
    Private Workshops and small groups
    Online Workshops via Google+ video chat

"Allure of Worlds" ~ © Brad Goldpaint

Phil Hart
    eBook REVIEW: "Shooting Stars" - How to Photograph the Stars & the moon


David Kingham
    WebsiteContact • Telephone: 970-372-0752
    Workshops: 2013 schedule for on location workshops

"Cupid Mountain Milky Way" ~ © David Kingham

Dave Morrow
    Website
    Online Tutorial: Star Photography Basics (Free)
    Video Tutorials: Star Photography Post Processing
    Lightroom Presets: Under the Stars Lightroom 4 Presets

"Shoot Me to the Stars" ~ Mt. Rainier from Sunrise Point ~ © Dave Morrow

- - -


Friday, November 15, 2013

"Shooting Stars" eBook Review


If you are looking for a solid foundation on how to photograph the night sky, Phil Hart's "Shooting Stars" eBook is an excellent resource.

Shooting Stars - How to Photograph the Moon and Stars with your DSLR is an eBook written and published by Phil Hart, (129 pages, version 1.2, © 2012), and sold through e-Junkie.com for $19.95.

Although I was hoping to find more images to inspire me in my astro-landscape photography, what I found instead was a well designed ebook that contained good how-to information, with lots of informative charts, illustrations, and photo examples. In my opinion, this ebook is positioned for the beginning and intermediate night photographer, but even the experienced nightscape shooter is going to find a few ideas and techniques that will improve their nocturnal work. As for the inspiration, I suggest you follow my Night Photography Favorites on 500px!

Two image examples from the ebook, Shooting Stars, that did inspire me.
Contents: Shooting Stars is divided into four main sections: The Sky at Night, Night Sky Photography, Image Processing, and Wonders of the Night Sky. Here are few page examples:

Sample page layouts from Shooting Stars.
The Sky at Night section has 18 pages of basic charts and illustrations that show the starry night sky through the seasons, as well as phases of the moon. Three pages on light pollution and weather provide useful hot links to additional online charts, maps, and current conditions in your geographic area of interest.

Night Sky Photography section has 50 how-to pages. 23 pages are devoted to using your camera at night: how to choose the best lenses, how focus at night, what shutter speeds to use for various night situations, what ISO to use, and how to reduce noise. Tripods, remote releases, batteries, flashlights, clothing, and dew heaters are among the many equipment accessories that are discussed. Four pages cover twilight (or "blue hour) photography techniques, and 15 pages are devoted starry night photography. These sections provide photographers with an excellent foundation. They are nicely illustrated and explained in an easy-to-understand way methods that some find a little overwhelming. The four pages covering moon photography was the weakest section, and light painting was only given a casual mention on page 60.

Image Processing section has 19 pages of examples on basic night sky post processing via Photoshop, Lightroom, Aperture, and ACDSee Pro software. There is also a short subsection on star trail stacking and time-lapse video processing. The first four pages give examples of how your brightness levels and histogram should appear when you first review your images on camera, as well as discussing white balance.

Wonders of the Night Sky covers 33 pages about how to recognize, find, and photograph the Milky Way, meteors, comets, satellite flares, Zodiacal light, planetary conjunctions, noctilucent clouds, the Aurora Borealis, and even bioluminescence in our oceans.

There is also a Field Guide in the back of the book that provides a camera settings cheat sheet for shooting various night sky situations, including useful information on how to use your camera in the manual mode for Canon, Nikon, Pentax, Olympus, and Sony shooters.

Conclusion: Until I read Phil's book, I hadn't stopped to realize what a broad subject this book covers! He has done an excellent job in covering the subject in only 129 pages. Each subtopic is clearly explained and illustrated. Although he gives sufficient coverage for the average photographer, some areas could use further development. Advanced night photographers will be left wanting more technical information on some topics.

Although have been fairly critical of this ebook, I would still strongly recommend it to anyone who plans on taking one of my workshops. If they study it before coming, they will be better prepared and have a more enjoyable experience. Those who have already experienced one of my lectures or workshops will not only find this a good refresher, but will be given a taste of other nocturnal adventures they might wish to pursue.

$5.00 OFF Discount Code: I asked Phil if he would give my readers a special discount. If you order this ebook, use the discount code: ROYCE and receive $5.00 off the regular price. (When you order the ebook, be sure to press the "Update Cart" button to refresh the page, after entering the discount code —in order to get your $5 discount to appear. THEN press the PayPal checkout button.)

UPDATE (May 2014): I reviewed another night photography ebook, "NIGHTSCAPE - A Complete Guide to Photographing Under the Night Sky" by David Kingham. Although I highly recommend both books, I think photographers wanting to do my style of astro-landscape night photography will find a greater depth of information in Kingham's book.

Other Reviews: I ask some of my previous NighScape workshop participants to also review Phil's ebook. (Disclosure: I paid for their copy of the ebook.) Here are some of the thoughts and opinions I received (I've edited only to shorten some of their reviews, where it might be a repeat of information already given):
"Shooting Stars is a valuable gift and a must have for any photographer interested in Nightscape Photography.  A steal for the money, with or without discounts applied. The book far exceeded my expectations. I have many books on photography and found Shooting Stars a much easier read. Far more interesting than anticipated; even with all the Astronomic's and math equations involved. Shooting Stars is filled with many useful links and helpful videos. Incredible photography and simplified 'how to' tips. Lessons that, along with the knowledge I received in your course, has definitely given me a better understanding and more confidence to go out on my own and navigate the sky and shoot the stars. I learn best with a hands on approach. With my experience, if you would have recommended that I read the book first I would have been a bit lost. Thanks to you, Nightscape was my first successful shoot in low light and a night sky. I would recommend Shooting Stars for anyone who wants a great book to compliment a NightScape workshop."   — Rita Nielsen
- - -
"[This] book covers basic knowledge of the night sky and camera equipment needed to capture its beauty, to more advanced techniques and settings to produce great night photos, including Milky Way and star trails photos. 
"There is a ...good amount of detail about the different equipment used in night time photography...On the camera side, it describes shutter speed, ISO, noise reduction, and other camera settings...on the lens side, it shows the importance of having the right lens in terms of aperture and focal distance, and how to focus the lens in the dark, which can be problematic if  you don’t know of ways to do it...
 "In later chapters, the book gets a little more in-depth, and I found several of the chapters on some advanced techniques very interesting.  Star trails, and star trail image stacking is something that I have wanted to do for some time, but haven’t yet. 
"The best thing that I walked away with from this book was a comprehensive list of camera settings for the different types of photo shoots. …if you’re interested in shooting night photography of any kind, I would recommend looking at this eBook, especially if you are new to photography."  — J.M. Darter (See Mike's complete review, with his own night photos and some great advice, here.)
- - -
"…a good price point. I think it has an excellent overview of all aspects from the basics of astronomy to photographing the night sky (both moon and stars, as well as twilight) and simple post-processing.  This would be a very good overview for someone without prior night sky photography experience.  Its overall generalist view provides good background but certainly does not reach the details (as you know post-processing is deserving of a very long book).  Some of the information seems incomplete, for example, the description of cropped sensors.  It provides excellent samples of variations in outcomes with different lenses, ISO settings, and time.  (He does not seem to push the ISO to the capabilities of the newest sensors.)  I think the description of noise was great (best description I have read and very helpful).  In light of it being a ebook, I would think that it could and would be updated frequently.  It seemed a [bit] dated with respect to the DSLR information (wish he had put in [the] D600 and D800 since I don't know [how] they compare with the other Nikons on his help pages)."  — Steven and Denise Waterman
- - -
"Shooting Stars is a valuable and very reasonably price e-book that offers a comprehensive guide for night sky photography; there is something for every level of photographer here.  The illustrations are graphic and well thought out, so even a first casual glance through the book is productive. 
"If you are a beginning star shooter who is into the quick-start method, begin on page 31 and read about focusing; also take a look at/print out the “Camera Settings Cheat Sheet” on page 131.  Then get out there and start shooting.   
"If you are an intermediate night photographer, you might want to review the author’s Image Processing Steps starting on page 79; ... You will find there are many different approaches to processing star shots, so this is just one experienced photographer’s approach; consider it as a starting point on an interesting journey.
"For advanced night photographers, this will whet your appetite to be under the stars capturing the glory of the night sky, and will get your creative juices flowing.  If you are having issues with star timelapse sequences, you might be interested in some of Phil’s advice in this area. 
"Phil Hart’s Shooting Stars is a comprehensive, well organized, and easy to navigate resource for night photographers, and will be a welcome addition in anyone’s e-book library. 
"This book would be a helpful starting point for folks attending your workshops; the question is: would they actually open it and read it before arriving! Personally, I think it would be worth offering to your clients —even if they just skimmed it."   — Ann Ruttle
- - -
Featured Post: Royce Bair's 2014 Workshop Schedule — Learn how to photograph Milky Way NightScapes and more!


Wednesday, May 29, 2013

NightScape Photo Recipe

Milky Way over String Lake, Grand Teton NP. Canon 5DM2 • 15mm f/2.8 Fisheye • 30" @ f/2.8 • ISO 6400 ~ © Royce Bair

I am constantly asked to supply a simplified, step-by-step list of "ingredients" necessary to create my style of astro-landscapes (NightScapes), so here goes:

Your best photos of the Milky Way are taken without the moon present, and between 2 hours after sunset and 2 hours before sunrise.
1. Set your camera on a tripod.
2. If you have a remote release, use it. Otherwise, you can use your self-timer to set off the shutter (set it for the 2 seconds delay instead of the normal 10 seconds).
3. Turn your lens to manual focus, or shut auto focus off (otherwise the camera goes crazy trying to focus in the dark).
4. Set your focus manually to infinity. Check the accuracy by auto focusing on an infinity subject in the daytime, marking the position on the lens barrel, and returning the lens to manual focus (you can tape the position down as a precaution). You can also use your camera's "live view" function to manually focus at night on the brightest stars (enlarge the image on the LCD monitor for accuracy). Note: your camera has a one to two seconds video feedback delay (depending on the brand and model), so fine-tune the focus slowly.
5. Set your camera mode to manual (usually "M" on most cameras).
6. Select the highest ISO you have (but no higher than 6400).
7. If you have a prime wide-angle lens with a fast aperture, use it. Otherwise, zoom to the widest angle of view.
8. Set your shutter speed to 30 seconds. This is the longest exposure most cameras will give you without going to "B" for "bulb" ("B" does require a remote release).
9. Set your lens aperture ("F" stop) to the widest aperture (smallest number), which is usually f/3.5 (f/2.8 is better, but f/4 is acceptable). Here are good starting point combinations:
          f/2.8 - 30" - ISO 6400
          f/2.0 - 30" - ISO 3200
          f/1.4 - 30" - ISO 1600
          f/3.5 - 30" - ISO 6400 (-0.5 EV)*
          f/4.0 - 30" - ISO 6400 (-1.0 EV)*
          f/3.5 - 30" - ISO 3200 (-1.5 EV)*
          f/3.5 - 30" - ISO 1600 (-2.5 EV)*
*These underexposures are not optimum, but are usable by compensating in post production.
10. Set your White Balance (WB) to Tungsten or Incandescent (on most cameras this is the symbol of a light bulb, also called "indoor"). If you prefer a numeric Kelvin setting, use 3500K, 3200K or 3000K (the lower numbers will give your sky a cooler or bluer color). My favorite numeric Kelvin setting is 4000K. I believe this produces a more natural sky that is still cool, but not quite as blue. This also works well when mixed with 3200K light painted foregrounds. Some people prefer an Auto or Average (AWB) white balance setting if they have a lot of post processing experience. Auto or Average will give you a dark gray colored sky (you can change this to a more colorful sky in post production using Photoshop, Adobe Elements, or Lightroom).
11. Frame the Milky Way or several interesting star constellations, (try to silhouette an interesting foreground subject) and take your shot. Light painting the foreground can add even more interest to the composition.
12. Composing in the dark can be difficult. If you have an ISO higher than 6400, use it to shorten your exposure times so you can review your composition on the LCD monitor much quicker. Be sure to return to the lower ISOs (6400 or lower) for your final exposures.
13. Fine tuning your exposure: The more light pollution (from artificial lights or the moon), the more you can reduce your exposure by lowering the ISO (one stop or more).
14. Fine tuning your image: You'll notice that 30-second exposures will have some star trailing (blurring) when the images are enlarged, unless you are using an ultra-wide angle lens (i.e. 114º or wider). You can eliminate this slight blurring by reducing your exposure time to 15 seconds (and compensate with wider apertures or higher ISOs). This technique is a simplified version of the "600" or "450" rule.
For hands-on instruction, visit my workshop page on Meetup.com.

Featured Post: Shooting Stars eBook Review — How to Photograph the Stars and the Moon

Friday, May 24, 2013

Adding Ballast to Stabilize Your Tripod

My tripod stabilized with a heavy bag of rocks during a time-lapse series.
Use the heaviest tripod you can stand to carry: Many wildlife photographers recommend that if a person wants sharp photos when using a long telephoto lens, one should buy the heaviest tripod that he or she can stand to carry into the field. Although nightscape photographers typically use wide angle rather than telephoto lenses to capture the night skies, the need for a stable tripod is still there, especially when multiple exposures are required.

Or, add the extra weight once you're on location: One way to get the stability of a heavy tripod is the add the weight or ballast after you get to your location. Ballast is often defined as the heavy material that is placed in the hold of a ship to enhance stability. In my night photography, this ballast comes in the form of a canvas shopping bag that is partially filled with rocks (gathered on location) and hung from the bottom center of the tripod.

The day or night solution to sharp images: I often use this same technique for my daytime photography. The new light-weight carbon fiber tripods are very sturdy, but I've discovered that even a medium breeze can sometimes shake my camera and blur my images. Adding ballast in the field offers a win-win solution!

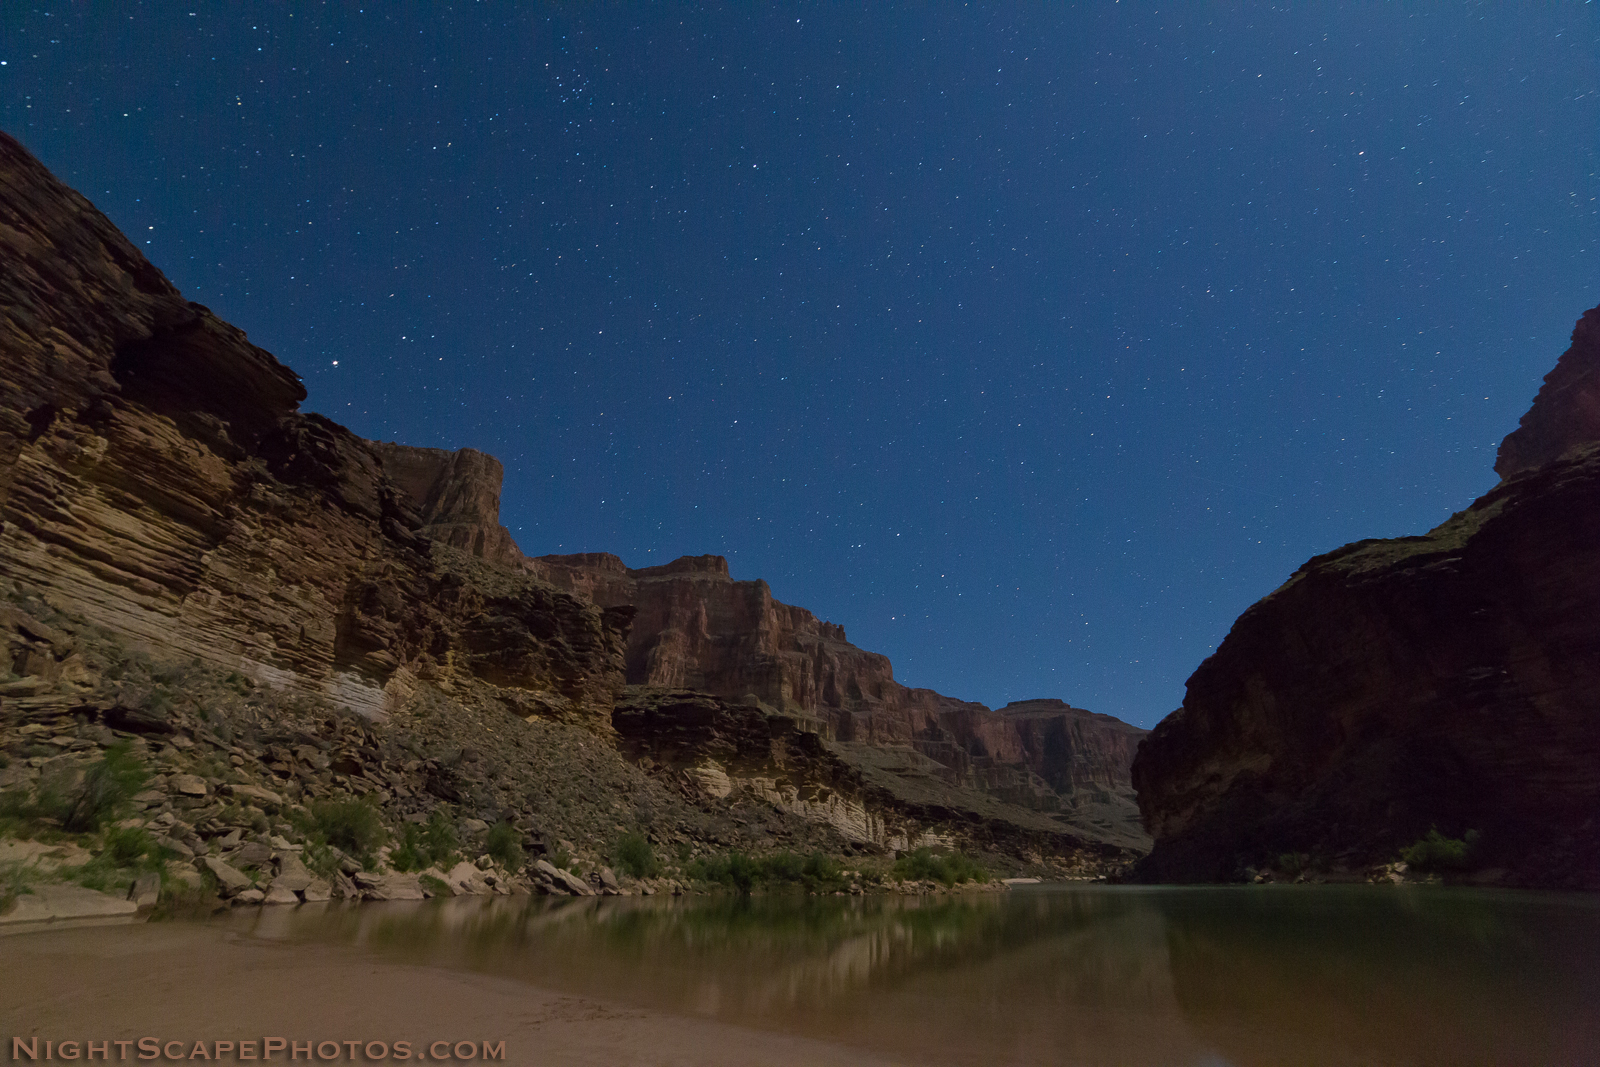
In the night scene below I captured the Grand Canyon and the Colorado River bathed by the light of a quarter moon. Six hours later, after the moon had set, I was able to capture the glory of the Milky Way. Because the weighted tripod remain perfectly stable between the two exposures, combining these two images was fairly easy in post production.

Grand Canyon and the Colorado River bathed by moonlight ~ © Royce Bair
6 hours later, with the moon gone, I can now capture the glory of the Milky Way ~ © Royce Bair
In post production, I easily combined the two exposures because of perfect alignment, due to a stable tripod.
Equipment Used: For the above photos, I used the Canon EOS 5D Mark III camera body with a Rokinon 14mm f/2.8 lens. The 5D Mark III provides excellent low-noise control at the high ISOs I need for this type of starry night photography, and the ultra-wide (114º) Rokinon lens provides excellent coma aberration correction. The camera was mounted to a Manfrotto 410 Junior Geared Head, attached to a light-weight Manfrotto 190CXPRO3 3-Section Carbon Fiber Tripod (weighted down with my canvas bag of rocks). You can read about the benefits of using a geared head here.

When I am on unstable soil, i.e. sand, I also take the precaution of placing flat rock supports under my tripod legs so there is less chance of shifting between exposures. (During the night, wind gusts reached over 40 mph, so I was glad that the tripod had been weighted with the bag of rocks!)

Flat rocks under the tripod legs provide added support when on unstable soil, i.e. sand.

Wednesday, March 27, 2013

Hangout with Starry Night Landscape Photographers

A Google+ Hangout w/8 "Starry Night Landscape Photographers" (click to see YouTube video)

Last night I hosted and moderated a Google+ video "Hangout" with seven other starry night landscape photographers. There was some great information shared during this hour-long broadcast, which was recorded and saved on YouTube. We discussed and reviewed 21 of our night photos. And because video quality can sometimes be lacking, you can also follow along with higher resolution views at this website.


Our eight "star" panelist were Ben Canales, Brad Goldpaint, David Kingham, Greg Gibbs, Jack Fusco, Mike Berenson, Mitchell Prout, and myself, Royce Bair.

Learning curve: There are some production errors in my first attempt at hosting this many people—such as not moving the "camera" screen to the person who is talking (I eventually get better, so bear with me).  In future broadcasts, I may bring in a full time producer, so I can concentrate on hosting my guests.

Behind the scenes: After we ended the broadcast, we all stayed online for another hour, talking, sharing stories, information, and experiences (too bad this wasn't recorded, as these off-the-record chats were the best part of the evening).

In future hangouts: I plan to do some one-on-one interviews and bring in more public discussion and interaction. Your suggestions would help me plan these future events.

Links mentioned in the broadcast. Here are some of the items mentioned in last night's hangout:

International Dark Sky Association
RegiStar by Auriga Imaging (Mike uses for stacking sky exposures)
Rigel Systems Starlite 2-RED LED Flashlight (preserving your night vision)
...Starlite Mini 2-RED LED Flashlight
Brinkmann MaxFire Marine Dual Xenon Spotlight (used by David and Mike)

Night photography forums and tutorials:
...via Mike Berenson
...via David Kingham
...via this blog (there are dozens of tutorials and how-to articles here)

Night photography workshops:
...by David Kingham
...by Mike Berenson
...by Brad Goldpaint
...by Royce Bair

Featured Post: Shooting Stars eBook Review — How to Photograph the Stars and the Moon
Advertisement: Hot Weekly Photography Deals - Amazing discounts (updated twice a week).