Share:

Showing posts with label time lapse. Show all posts

Tuesday, May 5, 2020

MSM 2-in-1 Star Tracker Review

"Head on Collision with the Milky Way" ~ a tracked and blended exposure, taken on a lonely road near Buhl, Idaho. The sky portion is a two-minute exposure, tracked with the MOVE-SHOOT-MOVE 2-in-1 Star Tracker. The highway was a separate, blended exposure taken during the morning twilight. The car headlights were one of three lucky occurrences that happened near 4:00 that morning!

MOVE-SHOOT-MOVE is a compact star tracker that also doubles as a time-lapse rotator. I have friends who have bought star trackers and have never used them to take a photo, because they were too complicated to set up! And these are intelligent people. The Move-Shoot-Move is the most compact and easy to set up star tracker I have ever used. From the time I placed it on my tripod to finished alignment was only about two minutes, and within a couple more minutes I was shooting tracked images of the stars. Now I discover it can do time-lapse movements as well! That will be my next outing—however this review will be mainly about its star tracking features.


The MSM Tracker/Rotator is only 3.875 x 3.125 x 1.375 inches (9.84 x 7.94 x 3.49 cm). Weight is only 1.01 pounds (450 g). It's simple 2-button design controls Northern and Southern Hemisphere rotations, full and 1/2 tracking speeds, and four choices of time-lapse movement speeds. Power is supplied by an internal lithium-ion battery that is non-interchangeable, but is rechargeable via a supplied USB cable. Although they claim over 5 hours of runtime, I was only able to get a little over of 2 hours of use during the colder winter months (before a blinking red light indicated the battery was getting low), which is quite typical of li-ion batteries under cold conditions. When I've need longer tracking (or rotator) time, I've plugged in a portable auxiliary USB power source (the MSM will operate while it is recharging or receiving auxiliary power). 

Limitations: The MSM has a maximum load capacity of 6.6 pounds (3 kg), which compares to the popular iOptron SkyTracker Pro and my first tracker, the Vixen Polarie Star Tracker. If you need a tracker that can carry heavier loads and has more available counter balance accessories, I'd recommend the Sky-Watcher Star Adventurer, with its 11 pound payload capacity—however, be prepared for a more intimidating set up (my first experience took me over half an hour).


Here's my personal set-up, using the MSM 2-in1 Tracker/Rotator. I used my own MeFoto ballhead, but MSM's basic "Starter Kit" comes with a similar ballhead (actually better quality than my MeFoto Q1) and a laser Star Pointer for $310.00 (current sale pricing is $259.00). Although you may already have a ballhead lying around like I did, I strongly recommend going with the "Starter Kit" option because these orders are shipped from a U.S. warehouse, and only take about 4 days to get to most continental U.S. locations. Other kit options ship directly from the factory in China and my first order took over two weeks to arrive to my Utah address.

Move-Shoot-Move special sale pricing
(Use the Discount Code ROYCE at check out
for an additional 5% off your order)


My same set-up viewed from a different angle. The green laser Star Pointer (included with the "Starter Kit") attaches to the MSM unit via a nylon thumb screw and the laser slides into the laser holder, which is secured by another nylon thumb screw. The tripod ballhead is released and the MSM, with the attached laser, are then pointed at Polaris (the North Star), which properly aligns the system (often in less than 30 seconds)! The camera is then attached to the MSM's ballhead via its quick release and pointed towards the Milky Way or a star constellation. The whole process only takes a few minutes.


The green laser Star Pointer makes alignment a quick and uncomplicated process. I found the alignment accuracy to be very good when using any wide angle lens, and even accurate for a normal 50mm lens. My 85mm started to show slight star movement on exposures over 3 minutes, so I'd recommend MSM's optional Polar Scope ($79.98) when using telephoto lenses.

Dim laser beam problem: The Star Pointer comes with a rechargeable li-ion battery and USB charger. I found the brightness of the green laser beam diminished significantly on cold nights. However, by removing the li-ion battery and warming it in my hand or pocket for just a few minutes brought the brightness back to normal strength.

If you live in Australia, I'd suggest you order with the Polar Scope option (Basic Kit A), because laser pointers are not allowed in your country. In fact, anyone living in the Southern Hemisphere might want to use this option. If you travel a lot, you may wish to get both the Star Pointer and the Polar Scope (Basic Kit C).


Comparing Quality: Here's an enlargement from the top image, showing the Rho Ophiuchi cloud complex area. I'm comparing the same area exposed with the tracker off, using a 30-second exposure (click to enlarge for detail). Note how the longer, tracked exposure allows for lower ISO settings, reducing noise and improving detail. Even longer tracked exposures will allow one to stop down the aperture to also reduce lens aberrations. (This 24mm f/1.4 lens gets about a 65% reduction in chromatic and coma aberration when stopped down to f/2.8. At f/4.0, it would lose about 85% of its coma and chromatic problems.)


In this 200% enlargement comparison, you can see that even at 15 seconds, there is some star movement, although it probably wouldn't be too noticeable until one made a print larger than 16x20 inches. What is very noticeable, even in smaller prints, is the huge increase in the number of stars that tracking picks up, and the increase in tonal range (bit-depth) due to the lower ISO's and the light gathering power that a tracker allows your sensor to capture.

How does tracking compare with stacking? I often refer to stacking as the "poor man's answer to tracking." Quickly shooting about 7 to 15 exposures to stack later (with Starry Landscape Stacker or Sequator) will significantly reduce your digital noise, but it won't increase the detail (including the number of smaller stars you'll pick up) and tonal range nearly as much as tracking will.

Orion's Belt and the Orion Nebula ~ a 2 minute exposure without and with tracking (using an 85mm lens).

Pros & Cons: I love the MSM's simple, modular design and its ability to add accessories when needed. I use the laser Star Pointer for most of my tracked shots, and I rarely need the accuracy of the Polar Scope—but it's nice to have it when needed. Ever since I got this tracker, I've been shooting a lot more tracked shot, because it's much easier to set up than any tracker I've ever used. I can't wait wait to start using the time-lapse movement features! My only con is its 6.6 pounds limitation on load capacity, which has never been a limitation for the equipment I use, but might be for some who would want to use a big telephoto lens.

In Conclusion: I think Chris Cook, a MSM owner from Sydney, Australia summed it up best: "The biggest difference I’ve found is the colours which are brought out with longer exposures. A stack of 10 or more photos at 3200 or 6400 [ISO] at 10-15 secs [each] looks great; but, when compared to a single shot at 640 [ISO] for 150 secs, there is no comparison. The star colours are amazing and the nebula are much more noticeable."


Time-lapse Movement Feature: The MSM is a 2-in-1 product that also has four movement speeds to its rotator. This allows for several time-lapse options. MSM offers several tutorials on this, including YouTube videos.

Move-Shoot-Move special sale pricing
(Use the Discount Code ROYCE at check out
for an additional 5% off your order)

Wednesday, August 10, 2016

Photographing Meteor Showers by Thomas O'Brien

Double Arch in Arches National Park during the Perseid Meteor Shower ~ © Thomas O'Brien


2014 Meteor Reel from Thomas O'Brien. A collection of time-lapse shots from the past seven years of meteor showers. Please watch in HD —you can see more meteors. The footage was shot during the Perseid, Geminid and Leonid Meteor showers. (All footage shot and edited by Thomas O'Brien and is available in 4K resolution. Check here for additional credits, contacts, equipment, and software used in this production.)

Written by guest pro, Thomas O'Brien: Photographing a meteor shower is more like photographing a time-lapse than traditional still photos. You can never anticipate where or when a meteor is going to streak across the sky. In order to catch them you have to set up and take as many photos as you can throughout the night with a wide angle lens on the camera. If you leave the camera in the same position you can use the resulting images for a short time-lapse clip in addition to the still images you can capture.

On May 24, 2014 and through Memorial Day weekend, we are about to pass through a brand new comet tail.  Not much is known about this meteor shower, but we do know the debris was created by a comet passing through this area of space in the 1800s. The best viewing will be in the Northern Hemisphere (Southern Canada and the continental US). As with all meteor showers it could be a dud or it could be great. The meteors will be radiating from the north in the constellation Camelopardalis and should be visible all night in the northern hemisphere.

10 TIPS FOR PHOTOGRAPHING METEOR SHOWERS
  1. Find a location that is far away from the light pollution of major cities and towns. You can use this handy website to see at a glance where the dark skies are.  Use this site as a general guide, and keep in mind that there are things like oil rigs and mining operations that don't show up on these maps.
  2. Get set up as fast as you can, the more time your shutter is open and taking photos the more chances you have of capturing a meteor.
  3. Use a good sturdy tripod in order to get a sharp photo of a meteors.
  4. Focus to infinity. This can be somewhat tricky in the dark, so a good way is to pre-focus the lens when the sun is up and tape the focus ring with gaffer's or duct tape so it won't move while you are moving around and setting up shots. You can also focus on the moon (if present) or a bright star, or use your camera's live-view function. Obtaining accurate infinity focus is critical.
  5. You will need a wired cable release (just a simple cord with a locking shutter release button). Set your camera to the widest aperture the lens will allow, and the highest ISO that you are comfortable shooting with and an exposure that gives the best results for the location, light, and phase of the moon.  A good starting point is f/2.8, ISO 2000 and 15-25 seconds. If you have an f/1.4 lens, that's even better as it will allow you to shoot with a lower ISO and have a less noisy photo. As soon as you have a good exposure you can put your camera on continuous drive mode (where you press the button down and it takes photos until you release) then lock the button down on the cable release.
  6. Use your fastest f-stop (the lower the f-stop number the better) and widest angle lens you have.  You are looking for a lens that is at least f/2.8 and preferably an f/1.4 lens. The lower the aperture the more light will get let into the camera.  You will capture about double the meteors with a lens that opens to f/1.4 when compared a f2.8 lens.
  7. Have an adequate power supply (a battery grip on your camera with dual batteries) or direct DC power connector to an external battery pack. You are aiming for shooting all night long with very few or no breaks in shooting (remember the goal here is to keep the shutter open and taking pictures as much as possible while you are out there). The best meteors are generally just before sunrise so try to make sure your camera is taking images all night. In a pinch, it's fine to use a single battery with a replacement that you can quickly swap.
  8. Position the camera facing anywhere from the Northwest to the Northeast will give you the best results. I have found that positioning the camera slightly away from the radiant point of the meteor shower results in longer meteors since they are not coming straight at the camera. The position of this radiant will make for some incredible time-lapse footage spinning around the north star.
  9. A large capacity and relatively fast memory card for your camera. You want to try to get a card that will hold an entire night's shooting and also has a fast enough write speed so your camera can empty the cache and continue to take images without having to pause. If you have to stop to change cards you may miss a giant fireball meteor. I usually shoot with 64 Gb compact flash cards and have found that you can generally get through most of a night even in the winter with one of these cards.
  10. Composition - after all the techy stuff, you still want to make a compelling image. Choose a foreground element, such as as stand of trees, a rock formation, or mountains. Something to anchor the photo and give it a great look rather than just a shot of the stars and meteors alone in sky. At the same time, you want to include as much sky as possible, and this why we recommend the widest possible lens.
Now, get out there and capture some meteor showers!

An O'Brien "selfie"
Thomas O’Brien grew up in Stowe Vermont. He started exploring the woods and mountains at an early age he picked up a camera and began to document his adventures around the age of 15.  After focusing on the arts in high school he moved out to Utah and attended the University of Utah where he earned a Bachelors of Arts in Photography.  While attending school in Utah he also was a member of the first US Snowboard Team and raced on the World Cup from 1993 – 1999 with a number of podium finishes and was ranked 13th in the world for combined racing disciplines.  While attending school in Utah, Thomas was a co-founder of Volume Video magazine, it was the first video magazine that documented the changes in the ski industry from 1990-2006. He helped produce 14 issues of the video magazine working on motion graphics, video editing, website and print ads.  

After graduating from the University of Utah, Thomas immediately dove into the photography industry working at The Stock Solution in Salt Lake City where he sold stock photography then branched out into archiving, scanning, retouching and then fine art printing and art reproduction at Bair Art Editions.  In 2001 he moved to Aspen Colorado to continue with a focus on fine art printing to become the Director of Digital Arts Aspen, a high end digital studio, classroom and fine art printing studio.   While Working at Digital Arts he met Lynn Goldsmith and began working as her Studiomanager shortly after, where he did scanning, celebrity retouching, archiving, book layout, fine art printing, studio portraits and event photography.  

Thomas has called Aspen Colorado his home for the past ten years.  He currently works as a  freelance photographer, consultant and photo instructor (both private and group workshops).  For the past year he has been focusing on a series of fine art landscapes and exploring new techniques to capture extremely high resolution panoramic images and photos of the night sky.  Near the end of 2013 and early 2014 Thomas re-focused on capturing video and time-lapse photography, after having taken four years off from shooting video and motion.

More of O'Brien's photography and stock footage are available at his tmophoto.com website

Additional Meteor Shower Photography Resources:
Yuri Beletsky's Geminid meteor shower photography
David Kingham's "Snowy Range Perseids" photography
David Kingham's "Nightscape" eBook (David has one of the best how-to sections on capturing meteor showers that I've ever seen —highly recommended for the serious night photographer)


Thursday, April 21, 2016

VIEW Intervalometer: Auto Ramping, Instant Preview, WiFi Remote


VIEW is a smart auto ramping intervalometer that's also a portal to your camera. You can setup and preview time-lapse from the VIEW or your smartphone. My friend, David Shogren, introduced me to this new product last week, and I felt it merited mention in this blog. The auto exposure ramping feature, alone, makes this a valuable accessory for me.

VIEW is a new Kickstarter project by Elijah Parker. As of April 21st, 283 backers have pledged almost $94,000 of its $100,000 funding goal, with 8 days to go until April 29th. Building on the experience and success of Elihah’s original Timelapse+ Intervalometer, the new VIEW intervalometer redefines the category offering a whole new set of features.

Preview your time-lapse - even before it's done! Have you ever been tired of waiting for a time-lapse to complete and packed up early only to discover after hours of processing that it was just becoming good when you stopped?  With the VIEW intervalometer you can see what you're getting, while it's still going.  This means you can end it with confidence knowing you have the results you wanted, or find renewed patience after seeing things are just getting started.


Intelligent Automatic Ramping. This is the clincher for me: The VIEW intervalometer can automatically ramp the exposure by analyzing the exposure value of each image and feeding it through a sophisticated algorithm to deliver perfect results for sunset, sunrise, milky-way or all of the above and more!

Features Already Complete & Working

Planned by the time it ships
  • Interface Refinement
  • Sony Alpha Support
  • Focus Ramping
  • Bulb Ramping
  • ND filter support
  • Motion (NMX) Integration (connect via bluetooth or USB)
  • Long-term time-lapse / scheduling options (e.g., weekdays 9am-5pm)
  • HDR Photography / HDR Time-lapse

VIEW Prototype Product Review: Ron Risman of Timelapse Workshops gives an excellent review of the VIEW, using a prototype model. He has also published a recent Vimeo video showing its auto ramping abilities.

Pledgers of $340 or more will receive the VIEW Intervalometer sometime in August 2016. Like all Kickstarter projects, no monies are actually transferred unless the project meets its minimum funding goal ($100K in this case).


Tuesday, December 30, 2014

Urban Nightscapes by Sergio Garcia Rill


What if one could see the Milky Way behind a big city skyline? What if the lights of the city didn’t interfere with the view of the starry night sky? That was the thought astro-landscape photographer Sergio Garcia Rill had when he decided to create his latest time lapse video, “Urban Nightscapes Texas.”

Sergio had been shooting astro-nightscapes for a few years, and because of light pollution he had to travel hours from the city to be able to see and photograph the night sky. “But I wanted to make a combination of what it might be to see the night sky from within the city and my Urban Nightscapes series was born,” Rill wrote in his blog.

Sergio makes it clear, the images and video he’s produced are mockup views. “The stars in the video have been added through digital manipulation and the sky doesn’t look that way inside the city due to the light pollution.” I did my best effort to try to simulate the sky as it would have looked without light pollution…I’m aware that these kind of shots are (at least at the moment) impossible to do in camera.”

Rill admits that the process was not simple or quick, but at the moment he feels that going into the technical details on how he did it will only change the focus from the actual video to the process of achieving the video. He does reveal that he used Nikon D600 and D750 cameras for both the foregrounds and backgrounds, and various lenses including, Nikon 14-24mm f/2.8, Nikon 24-70mm f/2.8, Nikon 35mm f/1.8, Bower 14mm f/2.8 and Bower 24mm f/1.4. Sergio used Lightroom, Photoshop and LRTimeLapse for doing his processing.

Challenges: “Although the biggest challenge was the processing of the images, finding the right locations that could represent each city and a good angle for aligning the night sky was the second most challenging and time consuming task,” reports Sergio. The images for the city foregrounds were taken around Houston, Dallas, Austin and San Antonio Texas. The skies were taken at various locations in the United States (but mostly Texas).

Satisfaction: “I guess the most satisfaction I get is when I get asked what camera I used, or where did I go to shoot —because people believe there might be a place where the sky looks like this inside the city or that I have a special camera that would allow me to take these shots. While I'm not trying to fool anyone (and I do try to clarify that in the video description), those questions make me realize I made a good job and the resulting video looks ‘real’.”

Sergio Garcia Rill currently lives in Houston, Texas. Sergio is planning on doing a series of videos like this for other mayor cities, based on his availability to travel to new cities. Currently, his sights are set on his hometown of Mexico City.  More of Sergio's photography can be seen at  his website.


Tuesday, April 29, 2014

Time lapse in the Alabama Hills

Milky Way over Alabama Hills pinnacles ~ © J. Michael Darter (click to see video)
Mike Darter's Time Lapse: Last week, Mike Darter and six other photographers participated in a NightScape workshop I conducted in the Alabama Hills, located near the Eastern Sierras of California. Most of us just did still photography, but Mike also shot evening time lapse with his Canon EOS 6D and a Rokinon 14mm f/2.8 lens. Mike added motion control to the above scene and a time lapse he did of Cyclops Arch, using his SYRP Genie. In the above scene, Mike attached his camera to the SYRP Genie and had it pan at about the same speed as the Milky Way moves across the sky.

Milk Way over Mobius Arch, Alabama Hills ~ © J. Michael Darter (click to see same video)
In the time lapse segment of Mobius Arch, Mike used no motion control —letting the moving clouds in this scene add their own drama.

Mike with his oldest daughter
J. Mike Darter worked in law enforcement from 1991 to 2002 in Oklahoma City, Oklahoma and Dallas, Texas.  He is a co-founder and currently CEO of CCW Safe, LLC based out of Oklahoma City.  Mike has been involved in art since a young age, showing watercolor and mixed media from the age 13.  He was accepted to Pratt Institute of Art in Brooklyn, NY in 1987, but chose instead to attend the University of Oklahoma to study Criminal Justice.  He continued painting through college, and well into his law enforcement career, but became interested in photography around 2000.  He attends wildlife and nature photography workshops whenever he can, and is currently showing at a Cherokee Art Gallery in Tahlequah, Oklahoma, and will be showing at a private show in downtown Oklahoma City in December.  Mike would like to get some images licensed with some of the nature media outlets, but more importantly, introduce his daughters to photography and be able to spend some quality time on the side of a mountain with them in the future watching a sunrise. The above photo is one of Mike's favorites.  It is of his oldest daughter photographing the sunrise, at Myrtle Beach, this past summer.

Royce's 2014 
Workshop, Lecture & Video Conference Schedule: NightScapeEvents.com


Wednesday, February 19, 2014

Night Time-Lapse Clips used in e-Cigarette Ad

Six frame captures from the eight time lapse clips used in the Vuse digital cigarette TV ad.
(Click on the video below — or CLICK HERE if video box does not appear in your
browser or device, or go to the end of this post* for a more compatible video version)

Reynolds American, the second-largest tobacco company in the U.S., recently rolled out a slick TV ad for their new e-cigarette, "Vuse". This is their first television ad in decades. The ads were test marketed last year in Colorado, and are now appearing in other areas across the United States.

Although the above online video is in low-rez (about 360p, compared to the stunning 1080p HD version I saw on TV), the first half of the ad will still give you goose bumps. The ad has eight time lapse clips, i.e. the earth viewed from the International Space Station, star trails, the Milky Way, the aurora borealis, and cityscapes at night (imagine the licensing fees the photographers got for their footage). It's evident that the ad agency (Chi and Partners) which produced this ad saw the power and attention-grabbing draw that "nightscape" style time lapse continues to have on the public!

The ad is so slick, some have remarked that it looks more like the rollout of an Apple product than a Camel invention (Reynolds American is the parent company of R.J. Reynolds Tobacco Company). For more background information on the ad, read this Advertising Age article.

*Some held-held devices can play this version (below), or you can show it with higher quality in a new window.


Royce's 2014 Workshop, Lecture & Video Conference Schedule: NightScapeEvents.com
  -  25% OFF savings on select "IMAGE10" workshops booked before April 1, 2014  -

Friday, May 24, 2013

Adding Ballast to Stabilize Your Tripod

My tripod stabilized with a heavy bag of rocks during a time-lapse series.
Use the heaviest tripod you can stand to carry: Many wildlife photographers recommend that if a person wants sharp photos when using a long telephoto lens, one should buy the heaviest tripod that he or she can stand to carry into the field. Although nightscape photographers typically use wide angle rather than telephoto lenses to capture the night skies, the need for a stable tripod is still there, especially when multiple exposures are required.

Or, add the extra weight once you're on location: One way to get the stability of a heavy tripod is the add the weight or ballast after you get to your location. Ballast is often defined as the heavy material that is placed in the hold of a ship to enhance stability. In my night photography, this ballast comes in the form of a canvas shopping bag that is partially filled with rocks (gathered on location) and hung from the bottom center of the tripod.

The day or night solution to sharp images: I often use this same technique for my daytime photography. The new light-weight carbon fiber tripods are very sturdy, but I've discovered that even a medium breeze can sometimes shake my camera and blur my images. Adding ballast in the field offers a win-win solution!

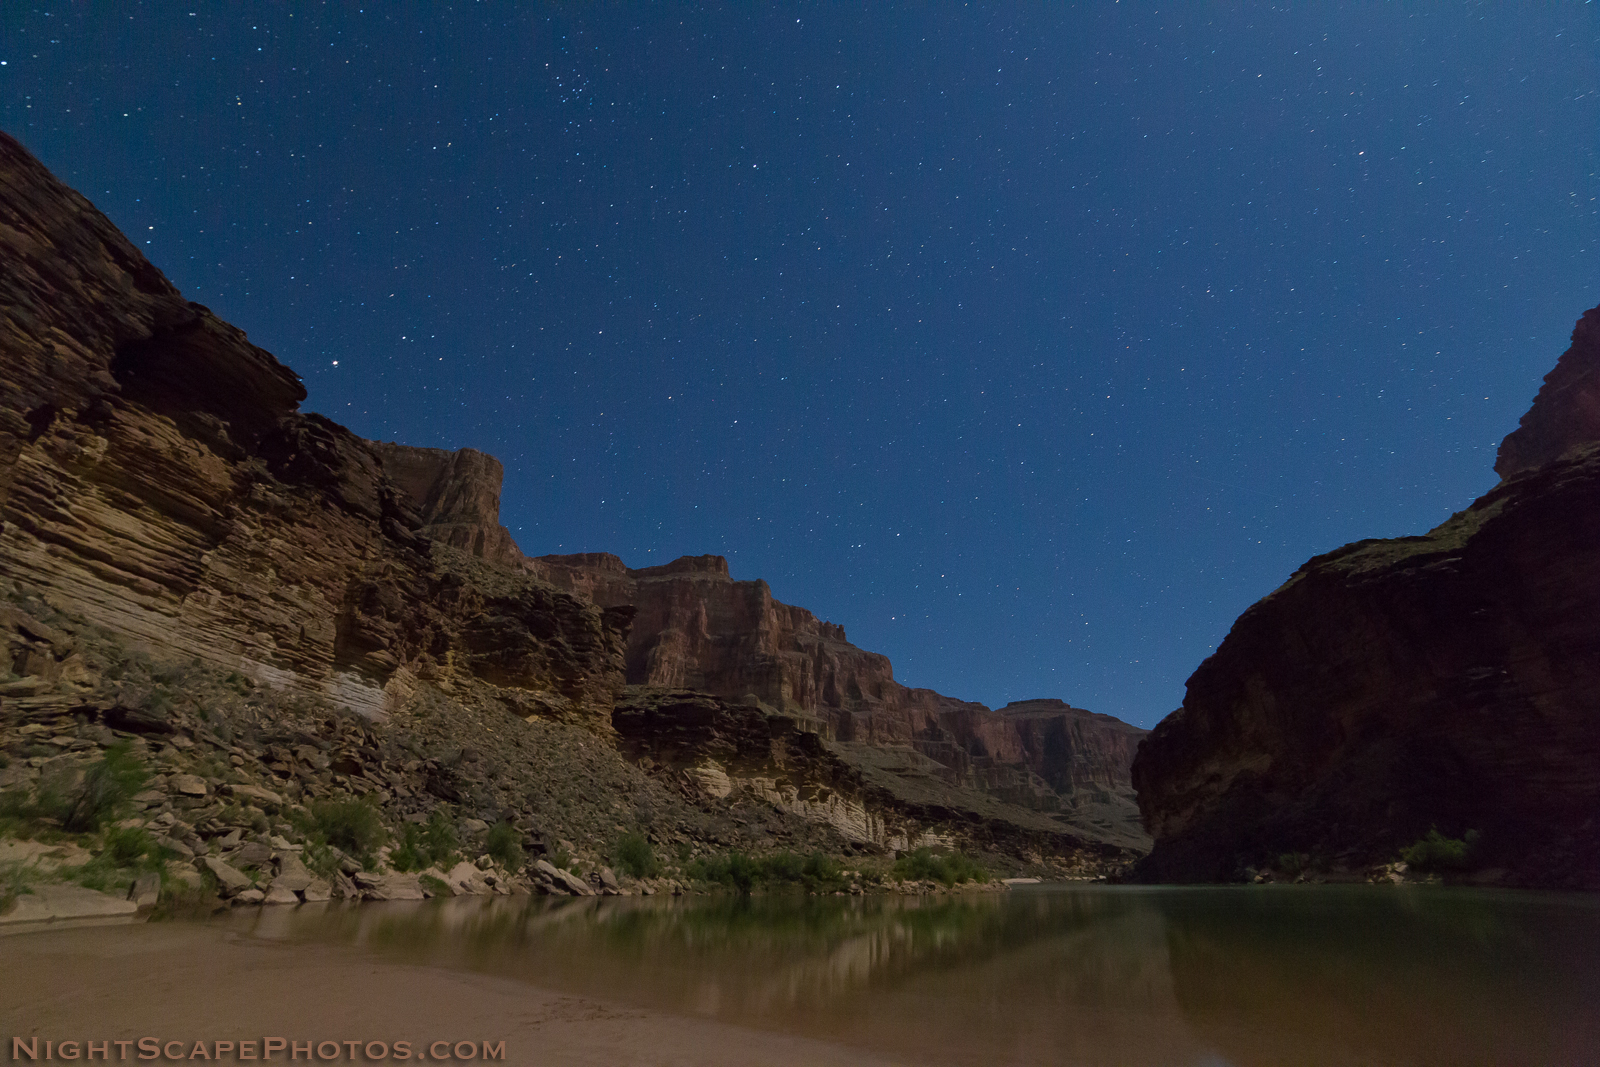
In the night scene below I captured the Grand Canyon and the Colorado River bathed by the light of a quarter moon. Six hours later, after the moon had set, I was able to capture the glory of the Milky Way. Because the weighted tripod remain perfectly stable between the two exposures, combining these two images was fairly easy in post production.

Grand Canyon and the Colorado River bathed by moonlight ~ © Royce Bair
6 hours later, with the moon gone, I can now capture the glory of the Milky Way ~ © Royce Bair
In post production, I easily combined the two exposures because of perfect alignment, due to a stable tripod.
Equipment Used: For the above photos, I used the Canon EOS 5D Mark III camera body with a Rokinon 14mm f/2.8 lens. The 5D Mark III provides excellent low-noise control at the high ISOs I need for this type of starry night photography, and the ultra-wide (114ยบ) Rokinon lens provides excellent coma aberration correction. The camera was mounted to a Manfrotto 410 Junior Geared Head, attached to a light-weight Manfrotto 190CXPRO3 3-Section Carbon Fiber Tripod (weighted down with my canvas bag of rocks). You can read about the benefits of using a geared head here.

When I am on unstable soil, i.e. sand, I also take the precaution of placing flat rock supports under my tripod legs so there is less chance of shifting between exposures. (During the night, wind gusts reached over 40 mph, so I was glad that the tripod had been weighted with the bag of rocks!)

Flat rocks under the tripod legs provide added support when on unstable soil, i.e. sand.

Wednesday, May 15, 2013

Time-Lapse Earth ~ Edited by Bruce W. Berry

Milky Way stars and lightning storms over Africa (click any image to see video)
Sarychev Volcano

Get ready to be dazzled by the Earth's night show! All of these images were taken by astronauts onboard the International Space Station. (The ISS orbits our planet about once every 90 minutes and is about 350 Km / 217 miles above the earth.) Many of the images were shot at one frame per second. While this image of the Sarychev Volcano and one other scene was shot in the daytime, all other scenes in this clip were photographed at night. There are images of the Aurora Borealis, moonglow, city lights, stars, and lightning storms. The yellow/greenish line you see above the earth (in the photos below) is Airglow.

Video "Time-lapse EARTH": Although all the time-lapse sequences were taken by the astronauts, and made available for public use, we owe this unique edited compilation to Bruce W. Berry. Berry took all the footage and color graded it, de-noised, de-flickered, slowed it down, and stabilized it into what you see on this video clip. The music for this video is "Manhatta", composed & performed by The Cinematic Orchestra. Here are other frames from this short (4:08) movie: