Share:

Showing posts with label moonlight. Show all posts

Wednesday, April 8, 2015

Faking the Moonrise

This moonrise over Kailua Beach, Oahu, Hawaii is actually a sunrise: f/8, 1/400 sec., ISO 100 ~ © Royce Bair MMXI
When to fake a moonrise: It's very important that all my starry night landscape photography ("NightScapes") be as close to my camera raw originals as possible. Other than an increase in sky contrast, I resist heavy Photoshop manipulation. Editorial photography requires a high standard of ethics. Commercial and advertising photography is another matter. Here one is trying only to be illustrative and create an image that sells a product.

Moonrise over Kailua Beach was created purely to be a top stock photo seller, and I have succeeded so well, that it has also become one of the Internet's most often ripped-off images (that can happen, when an image goes viral).

How the illusion was created: To create the above image was ridiculously easy. I started out with a pretty sunrise. That camera raw image was opened within the Adobe Raw Converter (ARC), which is available for Photoshop, Elements, and built into Lightroom (refer to page 115 in my new eBook).

The un-cropped camera raw file opened in the Adobe Raw Converter (ARC)
The next step was to slide the color Temperature to the left —all the way to 2000º Kelvin. Some images may look better at around 2500º, and may need some Tint adjustment as well.

Sliding the color Temperature to the far left (i.e. 2000º) will suddenly give your sunrise a cool "night" look.
Once the image meets your overall tastes for a "night" image, open the image and continue to make adjustments in Photoshop, Lightroom or Elements. That's it!

               Royce's 2015 NightScape Workshop Schedule


Wednesday, May 21, 2014

'Into the Future' by Jeremy Thies

"Into the Future" - Moonbeams through snow covered trees ~ © Jeremy Thies 2014
Canon 6D • Samyang 14mm f/2.8 • 30 seconds, f/4, ISO 4000


Jeremy Thies of Casper, Wyoming, created our Photo of the Day. This photo was taken on Casper Mountain, which is about a 15 minute drive from Casper. The starburst affect from the moon was present straight out of camera, although Jeremy did enhance it and spread it throughout the top section of the image, using luminosity masks and sharpening/brightening in Photoshop CS6.

Jeremy Thies has lived in the scenic state of Wyoming most of his life. He is a 100% self taught photographer, specializing in landscape photography. He has a bachelors degree in Criminal Justice and spends the majority of his time working at a law firm. "Every free chance I get, you can find me out photographing some landscape, storm, or sunset —early mornings aren't my thing," says Jeremy!

More of Jeremy's photography can be seen at his website and on Google Plus.


Royce's 2014 Workshop, Lecture & Video Conference Schedule: NightScapeEvents.com

Friday, October 25, 2013

Moonrise Behind East Mitten

Moonglow behind East Mitten ~ © Royce Bair
Canon 5D MK3 • 70-200mm lens @f/4.0 • 4 sec • ISO 320
I just returned last night from a two-day pre-workshop scouting trip in the Monument Valley Navajo Tribal Park. As the rising of the moon overpowers the stars, this was my last photo of the evening (not to mention the increasing cloud cover).

"Blue" moonlight hue conversion
A rising moon adds a dramatic touch to astro-landscape photos. Although moonlight is about 135 times brighter than starlight, and quickly subdues all but the brightest stars, capturing its early advent mixes nicely with the stars. I can't wait to show these NightScapes and others to you in future posts.

Note: This really was the color of the sky, as the moon rose that night. At some point, I'm going to process this image through the raw converter (ARC) and produce a more traditional, "blue" moonlight image. Until then, here's a quick 'n' dirty hue conversion.


Royce's 2014 Workshop, Lecture & Video Conference Schedule: NightScapeEvents.com
Featured Post: Shooting Stars eBook Review — How to Photograph the Stars and the Moon

Monday, September 16, 2013

Light Painting Delicate Arch

Milky Way and light-painted Delicate Arch ~ © Royce Bair
Last week I conducted a 'NightScape' photography workshop at Arches National Park. We had crazy, wet weather! However, patient and persistent efforts by our group members allowed us to pull off some amazing shots during the windows of partial clearing that we were given.

The arch is lighted with a large, stationary, diffused light from the right (about 300 feet away). I'm providing an accent light from behind the arch with a small, hand-held, quartz halogen spotlight.

Our 'NightScape' workshop group photographing a moonscape behind a light-painted Delicate Arch ~ © Royce Bair
Earlier, we photographed a moonscape behind a light-painted Delicate Arch that my lighting assistant (my son, Chris) and I had arranged. (This is a totally different lighting setup than we used in the top photo with the Milky Way. Here, the stationary key light is coming from the left, and we are using small, moving spotlights on the right side to fill in harsh shadows.) A couple of hours after the moon had set, the clouds finally cleared enough to get the Milky Way shot (top) we had been waiting for.

Note: This ultra-wide angle shot, with the people in the foreground, makes the arch look smaller than it really is. Here's a better size comparison by Jaromir Dzialo.

Tuesday, April 23, 2013

Grand Canyon Night Photography - Part One

River runners around campfire with moonglow & stars behind granite cliff in the Grand Canyon ~ © Royce Bair
I just recently returned from a 7-day assignment to photograph a Western River Expeditions trip down the Grand Canyon. Unlike John Wesley Powell's expeditions in 1869 and 1872, my mode of transportation into and out of the canyon (the plane ride and the helicopter air lift) was much easier.

My 127 lbs. in four cases
Hillers with 1,000 lbs.
1872 vs. 2013: This photo of John K. Hillers shows some of the photographic equipment necessary to record an expedition, such as Powell's Grand Canyon surveys in the 1870's. Those were the days before it was possible to make photographic enlargements from negatives. A large photograph could only be produced by a large camera. Additionally, the wet-plate process of taking and developing photographs was unwieldy—requiring Hillers to bring some 1,000 pounds of equipment on his trips.

Unlike Powell's photographer, John K. Hillers, I carried only 127 pounds (located in the three Pelican cases and one large dry bag there on the tarmac). Like the other 17 guests that went on this trip, I also carried about 25 pounds of personal gear. Still, my 152 pounds amounts to about six times more weight I had to lug around than the average guest—all of which had to be loaded and unloaded from the boat each day. Even so, Western River Expeditions makes the process so much easier than Powell and Hillers had it. It was more like a 7-day picnic that included a great boat ride!

KEY GEAR used on this expedition:
  • Canon EOS 5D Mark III (A great full-frame camera. It is excellent for low-light, high ISO stills & videos. I use an older, Mark II as a 2nd body, which acts as my time lapse camera when I'm shooting stills and video at the same time.)
  • EF 24-70mm f/2.8L II USM Zoom Lens (great all-around lens with constant f/2.8 aperture).
  • Rokinon 14mm f/2.8 (ultra wide lens with coma correction for my signature NightScape photography—I shoot this lens wide open).
  • Rokinon 24mm f/1.4 (This is a super fast, wide-angle lens with coma correction for starry night landscape photography. I shoot this lens wide open, which allows me to lower my ISO from a normal of ISO 6400 for Milky Way shots, down to ISO 1600!)
  • Manfrotto 190CXPRO3 3-Section Carbon Fiber Tripod (I use 2 of these light-weight tripods because I often have two cameras going at the same time—one for regular night photography and the other for time lapse. One tripod has just a ball head on it, and the other has a geared head for fine adjustments and doing panoramas.)
  • Manfrotto 496RC2 Compact Ball Head (see above for details).
  • Manfrotto 410 Junior Geared Head (used on 2nd tripod—see above).
  • Joby Gorillapod Focus/Ballhead X Bundle (This is a pro version that is capable of serious use in low positions and in all kinds of hard-to-get positions. It can be a real life saver, and it supports as much weight as my big Manfrotto tripods and heads.)
  • GoPro Hero3 Black Edition (a great sports camera with waterproof housing -- very sharp 12MP stills and HD 1080p video @ 30 fps or 60 fps, or HD 720p @ 120 fps for great slow motion).
  • Steadicam Smoothee Kit for GroPro Hero (enables smooth, handheld video with the GoPro and your iPhone 4, just like the Hollywood big boys).
  • Vagabond Portable Power station (I used this 120VAC portable power source, with 2 extra lithium batteries to recharge all my camera batteries, including my iPhone).
  • Pelican 1510 Carry On Case (I used 3 of these rugged, waterproof, and sand-proof cases. I think the 1510 has the best capacity for the money, and a single unit qualifies as the maximum size airline carry on, even with the wheels and handle. The 4th case I use on this trip was not a case, but a "dry bag" that stored my tripods.)

Last rays of sunlight on the canyon walls at one of my favorite beaches ~ © Royce Bair
This crescent-moon shaped sandy beach was my favorite campsite on our Western River Expeditions trip down the Grand Canyon. The rich orange and red granite cliffs along this portion of the Grand Canyon are amazing, and much different than the typical sandstone layers (sedimentary) that are higher on the canyon walls. Because of these harder igneous and metamorphic layers, the canyon walls are much steeper and sandy beaches like this one are much harder to find—making this site even more special.

The campfire scene (at the top) was photographed using a Canon 5D Mark III with 14mm Rokinon lens @ f/2.8, 8 seconds, with an ISO of 3200. The quarter moon was just about to rise above the granite cliff.

Please come back every few days and see how I photographed the Milky Way and other starry night skies in this amazing canyon. (BTW, I found out today that Western still has some openings in their July and August trip schedules!)


Ad: 9 Canon DSLR Cameras & bundles with Great Rebates, 2% rewards, and Free Shipping
(Offer ends May 11, 2013)

Wednesday, January 23, 2013

Moonlight Versus Starry Night Skies

The light from the full moon is about 135 times brighter than starlight! ~ © Royce Bair
Even a quarter moon, low in the sky, can overpower all but the brightest stars ~ © Royce Bair
Even a crescent moon is 5X brighter than starlight.
Avoid Moonlight for the Best Starry Night Skies: Because moonlight is about 135 times brighter than starlight, your best starry night skies will be when the moon is not present. Even a crescent moon can be about five times brighter than starlight.

Only on a new moon? It would seem then that only on the night of a new moon, or the first night of a waxing moon, or the last night of a waning moon would be the only three nights of the month available for good star photo photography! Not so. While these three nights do offer excellent night darkness for star photography, there are selective hours on many other nights of the month that are suitable for good star photography, as you will see from the chart below. (To track the phases of the moon, I use The Old Farmer's Almanac Moon Phase Calendar.)

The day of the New Moon, and the day before & after offer excellent night darkness for star photography.
Nights before the moon rises, or after it sets: There are also those periods of the night when the moon has not yet risen, or it has set. These periods can often give you several hours each night for great star photography.

This window of photo opportunity must also meet the twilight requirement of being at least two hours after sunset, and at least two hours before sunrise. Let me explain, using the U.S. Naval Observatory charts for moonrise and moonset in conjunction with their charts for sunrise and sunset. With the U.S. Naval Observatory website you can enter a location and obtain a table of moonrise/moonset and a table of sunrise/sunset times for the whole year of your choosing.

Moonrise/set & sunrise/set times for July 2013 in Moab, Utah
Using moonrise/moonset charts: In this custom chart, I've taken moonrise/set times for the month of July 2013 and combined them next to the sunrise/set times for the same month (this illustration is for Moab, UT USA, which is the closest city to Arches National Park). On July 1st, the moon rises at 00:27 (12:27A.M.) and sets at 14:07 (2:07 P.M.) The sun rises at 04:58 and sets at 19:46. The 4th column shows the window of photographic opportunity. On July 1st, at 2 hours after sunset (21:46) you can start taking the best star photos, and continue until the moon rises the following morning at 01:01 (taken from the July 2nd moonrise row and column). The total time available for star photography (5th column) is 3:15 (3 hours 15 minutes). On July 4th, the window of opportunity begins to be limited by the rising of the sun, not the moon (02:59 is two hours before the sun rises at 04:59).

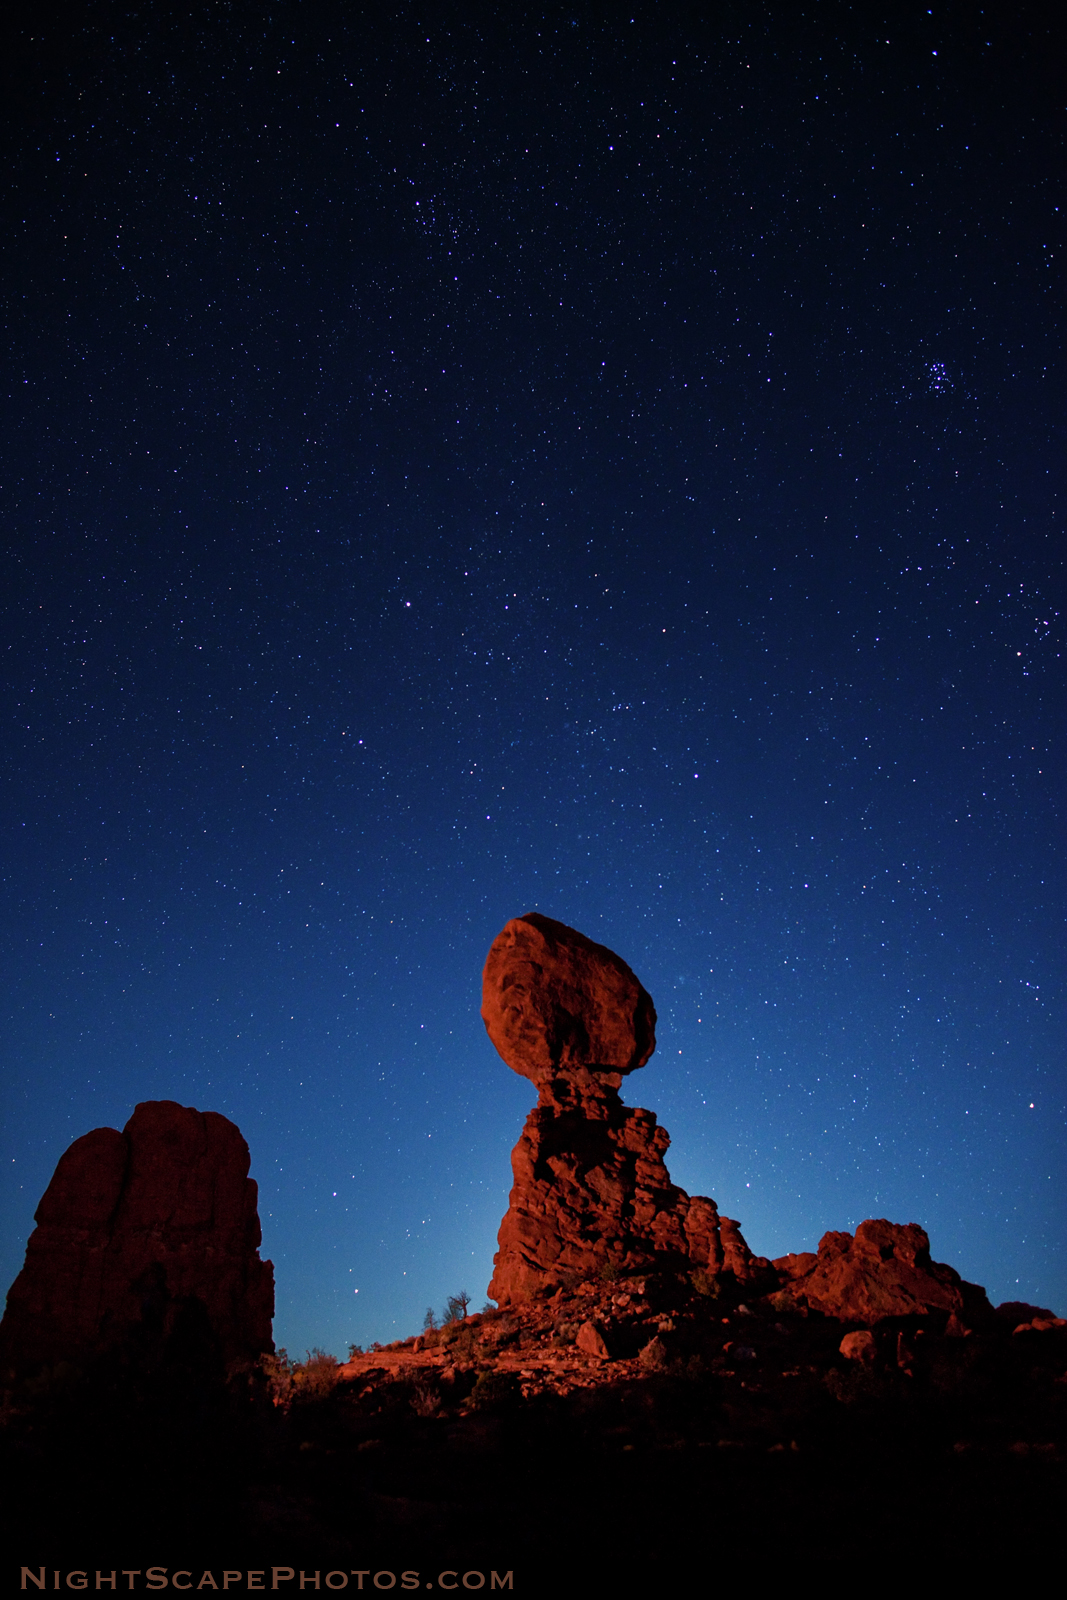
The area highlighted in darker blue is the 3-day period in July around the New Moon. Normally, this period would lengthen your night opportunity, but the long days and short nights of summer are the limiting factor here. From July 15 - 29, the moon goes from its First Quarter (50%), to Full Moon (100%), and to it's Last Quarter (50%). During this very bright period, it can still give off quite a bit of light to the sky, even below the horizon —for up to 30 minutes after it has set, and for up to 30 minutes before it rises. Hence, the highlighted times in the "Window of Opportunity" column. The sky directly above the setting and rising moon can be affected during these time periods, similar to this image.

NOTE: *These blank spaces in the table indicate that a rising or a setting did not occur during that 24-hr. interval. **During the "Window of [Photographic] Opportunity" I have set that period to midnight (00:00), even though it would most likely fall a few minutes after midnight on the following day. Please note that these times are shown in Mountain Standard Time (if you actually use this chart, you'll need to add one hour for Daylight Time, which would be in effect during July).

Starry Night Goal: If you follow these guidelines in avoiding moonlight, twilight from the sun, and man-made light pollution, your reward can be shots like this:

Milky Way over Teton Range and Jackson Lake ~ © Royce Bair

Royce Bair is the editor of this blog and the photographer of the above images. Here is my gallery of NightScape images. My schedule of workshops, tutorials, and other events is available here.

Advertisement: Hot Weekly Photography Deals - Amazing discounts (updated twice a week).

Thursday, January 10, 2013

Moonglow Behind Balance Rock

Moon Glow behind Balanced Rock, Arches Nat'l Park ~ © Royce Bair (Click for a larger view)
Moonlight is more than 135 times brighter than starlight, so even the approaching moon, just below the horizon can compete with your star photography! However, it can also add interest and beauty to your night photographs, if the timing and positioning are right.

In this photo, glow from a rising quarter moon, has been positioned directly behind Balanced Rock in Arches National Park. The midnight (12:21 AM) moonlight from the rising moon is overpowering all but the brighter stars. However, you can clearly see Pleiades, the Seven Sisters constellation (Messier object 45 or M45) to the right. Light painting for Balanced Rock is coming from a stationary, reflected quartz halogen spotlight (2-million candlepower) about 300 feet away, manned by my son, Chris (shining for only seven of our 13-second exposure). Taken with a Canon EOS 5DMII, using a
Canon EF 24mm f/1.4 L II USM Lens (13 sec @ F2.8 • ISO 2500).

Size perspective: As tall as 23 men, or a 13-story building —the total height of Balanced Rock is about 128 feet (39 m), with the balancing rock rising 55 feet (16.75 m) above the base. The big rock on top is the size of three school buses.

Advertisement: Hot Weekly Photography Deals - Amazing discounts (updated twice a week).