 |
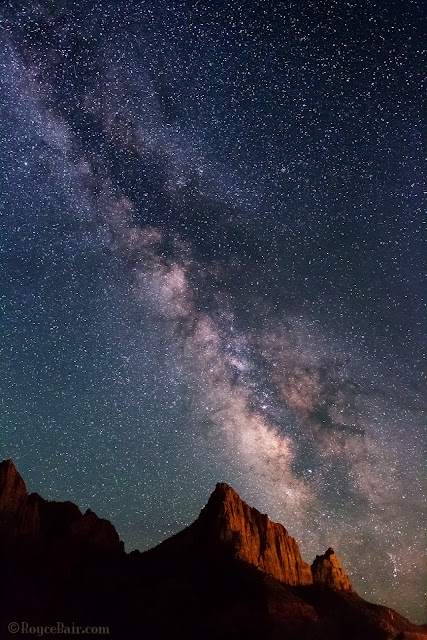
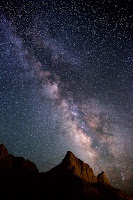
| Milky Way over The Watchman - Zion National Park, Utah. Light on mountain is light pollution from nearby Springdale city street lights ~ © Royce Bair |
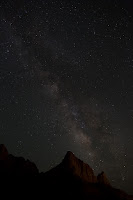 |
| Simulated naked eye view |
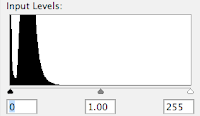 |
| Histogram of a "naked eye" exposure |
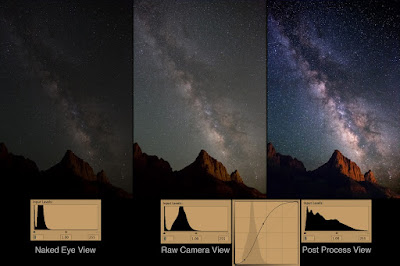
What the eye sees vs. what the camera sees. When people see my NightScapes for the first time the most common question is,
"Is that what the Milky Way really looks like with your naked eye? Can you really see that many stars in the night sky?" The answer is, "Yes and no." You really can see it quite clearly with your naked eye (if you are in an area with very little light pollution), it's just not as bright as I can see with my camera.
The reason is because my camera is manually controlled to take the images at a longer exposure (typically 8 to 30 seconds, depending on the lens I'm using), so it gathers more light for its sensor than my eyes can. Also, the human eye has an iris aperture that is rated at about f/4.0, whereas my typical night photography lens is rated at f/2.8 or wider (letting in twice as much light to the sensor).
 |
| Histogram of raw camera exposure |
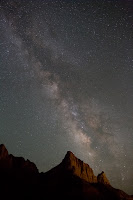 |
| Raw camera exposure |
Above, is a simulated view of what my eye saw of the Milky Way over The Watchman in Zion National Park — this is about two stops darker than what my camera recorded (to the right), using an f/2.8 aperture setting, an exposure time of 15 seconds, and an ISO of 6400 or 8000.
(Notice that the "toe" of the exposure histogram is just passing the midway point, whereas the toe of the simulated "naked eye" exposure histogram doesn't even come close to the midway point. This exposure is two stops less than what it should be —post production corrections can correct a 1-stop underexposure, but not a 2-stop underexposure. This means that if you only have an f/3.5 or f/4.0 lens; or your camera only goes to ISO 3200, you're still going to get an acceptable exposure, that's within the range of post production correction —provided you shoot in the camera "raw" mode, which typically has 16-bits of information, rather than the camera JPEG mode which carries only 8-bits of information per color channel. Here's a tutorial I created on the
benefits of 16-bits raw images vs. 8-bits images.)
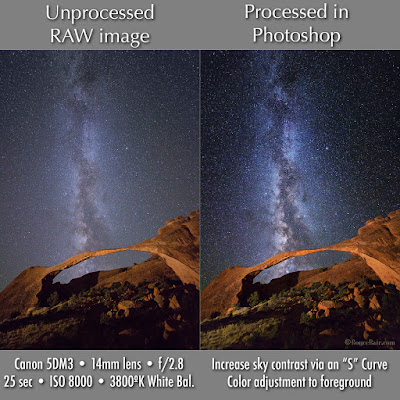
Post Production: The raw camera image has all the brightness and detail needed for a great photo, but it is flat or lacking in contrast. My final NightScape images are created in post production with very simple steps in Photoshop. All the stars are there in the camera's raw image, but a contrast gain in the sky is necessary to make them more apparent. My goal is give the same clarity you expect to see in an astronomical observatory (taken with a huge telescope) image, but with a wide-field view, coupled with an interesting landscape feature in the foreground — something the big telescopes cannot do!
 |
| After adding curve adj. |
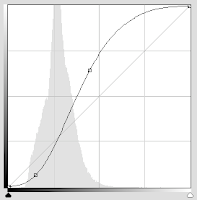 |
| "S" shaped adjustment curve |
The powerful "S" Curve. Here's the main Photoshop post production step I use to increase the contrast in the sky: I first select the sky, using the Magic Wand tool (I usually have to do a little Laso tool work to get all the bright stars into the selection). I then create a channel of the selection that I can use later. The second and main step is to turn that saved selection into a "Curves" Adjustment Layer that I can add a contrast-increasing "S" shaped adjustment curve.
(The shape of this curve is controlled by the two anchor points so that the curve pinches or brightens the large highlight area to the right of the histogram "mountain", and darkens the shadow area to its left.) The more vertical the line becomes between the two anchor points, the more your contrast gain.
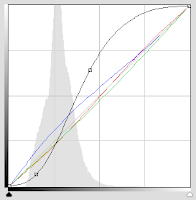 |
| Slight color changes via Curves |
Sky Color Balance. Every evening sky has a difference color to it, depending on the atmospheric conditions for that night. Some photographers shoot in the "AWB" Auto White Balance mode, which produces somewhat of a neutral coloration to the sky. Some will use a daylight White Balance (about 5250º K), giving a much warmer tone to the sky. Others will use the "Tungsten" (or incandescent) setting (about 3200º K) for a deep blue look. Although all of these settings can later be adjusted in Adobe Photoshop's RAW Converter, I prefer to set my Kelvin to 3800º. This setting usually give me the most natural look to my night sky.
Final, minor color changes can be made in Photoshop's Curves to the the red, green, and blue channels (represented by the three diagonal colored lines). Be careful to not over do this — as a little color goes a long way. The final coloration depends on what you remember seeing in the sky that night.
Adjusting the landscape. The final step is to use the same saved sky selection (channel) and inverse it so that it is now selecting the mountains, instead of the sky. Once this is done, another Adjustment Layer (you can use "Levels", or "Curves", but Curves is more powerful) is created from that selection in order to change the color of the sodium vapor lights (coming about a mile away from Springdale city) —so that The Watchman mountain is a more pleasing "red rock" sandstone color.
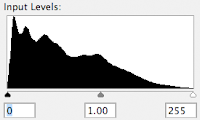 |
| Histogram after all adjustments |
Extended tonal range. The purpose of all these adjustments is to not only increase the contrast of the sky, but to extend the tonal range of the final image. Compare the histogram on the right to the histogram of the raw camera exposure, above.
Note: The "S" curve contrast adjustment naturally increases color saturation and vibrance. In most cases you will not have to artificially add more.
Compare: In the image below you can quickly compare the differences between the "naked eye" simulation, the "raw camera" exposure, the "S"-curve adjustment, and the final image —with the extended tonal range of its histogram.
 |
| Click to enlarge. |
Here is another comparison of the camera RAW exposure vs. simple post processing via the "S" curve in a Photoshop "Curves" Adjustment Layer:
 |
| Click to enlarge |
My eBook,
Milky Way NightScapes, provides additional post processing instruction in its 4th chapter.


