Share:

Friday, May 31, 2013

My '450' Rule to Stop Star Trailing

An 80-minutes star trail exposure vs. a 20-seconds exposure of the Grand Tetons ~ © Royce Bair
Longer exposures cause the stars to "trail"
Stars as Points of Light: My "NightScape" style of star photography endeavors to keep stars as points of light, rather than as star trails; and I also include a landscape feature in the photo. These two requirements make it necessary to keep my exposure times at 30 seconds or less—often much less. (I should mention that I also like to do star trail exposures, too :)

Equatorial Mounts: When astro-photographers take time exposures of just the stars, they use an equatorial mount and a tracking mechanism that keeps the stars in sync with the earth's rotation. Using this system, exposures can be extremely long without blurring the stars or causing them to "trail". If any of the earth's landscape is included in the photo, it is the landscape that would now become blurred during the exposure.

Sharp stars AND landscapes: Because astro-landscape or "NightScape" photos require both the stars and the earth to remain sharp during the time exposure, the length of the exposure must be short enough so that the stars do not appear to rotate or trail due to the earth's rotation.

The math to make it happen: Astronomers know that a normal lens views a smaller area of the sky than a wide angle lens, and a telephoto lens views an even smaller area of the sky. The narrower the field of view, the shorter time it takes for the stars to trail across the camera's picture area.

For this reason, lenses with a longer focal length (more telephoto) will have faster star movement or trailing than lenses with a shorter focal length (more wide angle). Using simple math, amateur astronomers developed a formula called the "600" rule to determine the maximum exposure times for various lenses mounted to 35mm film cameras. The 600 Rule formula says that 600 divided by the focal length of the lens (in millimeters) equals the maximum allowable exposure time in seconds. Example: a camera using a 24mm wide angle lens should use a maximum exposure time of 25 seconds (600 / 24 = 25).

< an 8-sec exposure and a 15-sec shot enlarged to 100% >
8"x10" prints look great using the 600 Rule, but not at 24"x30"
Going from 600 to 450: This old rule or formula is based on the image quality of a typical 8" x 10" enlargement. When images are enlarge to 16" x 20" and larger, more star movement or trailing is apparent, so I've adjusted the rule or formula to a base number of 450 in order to increase the image quality. The same camera using a 24mm wide angle lens should now use a maximum exposure time of 19 seconds (450 / 24 = 18.75).

A simple chart: Both rules or formulas are based on the full-frame 35mm (24x36mm) film format, so the chart below has a column for both full-frame sensor cameras (and their lenses) and a column the smaller APS-C sensor cameras (and their lenses). Users of the four-thirds (4/3) format should use the APS-C column. Instructions: Pick the column that describes your camera system. Find the number of millimeters that is closest to your lens, then find the maximum exposure time in seconds to the right in either the 450 (less star movement) or the 600 column. (To print this chart, select the blue text with your cursor and any instructions you want to include. Copy and paste the text into your favorite word processor. Change the text to a mono-space font, i.e. and "Courier", so the columns will be properly aligned, and print.)

                      "450"     "600"
                      Rule      Rule
   Full-Frm  APS-C*   Maximum   Maximum
   Sensor    Sensor   Exposure  Exposure
   Camera    Camera   Time in   Time in
   Lenses    Lenses   Seconds   Seconds

     8mm      5.3mm     56      75

     9mm      6.0mm     50      67
    10mm      6.7mm     45      60
    11mm      7.3mm     41      55
    12mm      8.0mm     38      50
    13mm      8.7mm     35      46
    14mm      9.3mm     32      43
    15mm     10.0mm     30      40
    16mm     10.7mm     28      37
    17mm     11.3mm     26      35
    18mm     12.0mm     25      33
    19mm     12.7mm     24      32
    20mm     13.3mm     23      30
    21mm     14.0mm     21      29
    22mm     14.7mm     20      27
    23mm     15.3mm     20      26
    24mm     16.0mm     19      25
    25mm     16.7mm     18      24
    26mm     17.3mm     17      23
    28mm     18.7mm     16      21
    30mm     20.0mm     15      20
    32mm     21.3mm     14      19
    35mm     23.3mm     13      17
    40mm     26.7mm     11      15
    45mm     30.0mm     10      13
    50mm     33.3mm      9      12
    55mm     36.7mm      8      11
    60mm     40.0mm      8      10
    65mm     43.3mm      7       9
    70mm     46.7mm      6       9
    80mm     53.3mm      6       7
    90mm     60.0mm      5       7
   100mm     66.7mm      5       6
   120mm     80.0mm      4       5
   135mm     90.0mm      3       4
   150mm    100.0mm      3       4
   175mm    116.7mm      3       3
   200mm    133.3mm      2       3

*Although the Canon APS-C sensor is slightly smaller than the Nikon APS-C sensor (1.6X factor vs. 1.5X factor), I did not feel the difference is significant enough to warrant a 5th column.

Notes: If your ISO is already to the limits, use the 600 column times, or go even a little longer if you have too (ugly noise is worse than having elongated stars). For the least star movement and highest enlargements, use the 450 column. Choose the shutter speed time that best fits your camera. For instance, if you're using a 24mm lens on a full-frame sensor camera, the 450 column says to exposure for 19 seconds. However, the closest setting on you shutter speed dial is 20 seconds. And, if you want even better enlargement quality (and your ISO isn't already max-ed out beyond your tastes), go one shutter speed setting lower to 15 seconds—you'll be surprised at the star movement difference, and the improvement in quality. Use some practical sense, too. For instance, many 15mm wide angle lenses made for a full-frame camera are "fisheye" lenses, with a view angle of 180º. Many 14mm wide angle lenses, made for a full-frame camera, have a view angle of 114º, making their view narrower than a 15mm! The 450 column recommends a maximum exposure time of 32 seconds for the 14mm, whereas the 15mm recommendation is 30 seconds. In reality, because the 14mm has a narrower field of view, an exposure time of 20 to 25 seconds will give much better results.

Normal and telephoto lenses: As you approach the normal and medium telephoto focal lengths, star movement becomes even more apparent. Although the 450 column says I can get by with a 9 second exposure (10 seconds on your shutter speed dial), the sharpness of the stars and planets in the photo below was greatly improved by going to only 5 seconds.

Morning twilight: Venus & Jupiter within the constellation Taurus (50mm f/1.4 lens @ f/3.5 • 5 seconds • ISO 5000)
Featured Post: Shooting Stars eBook Review — How to Photograph the Stars and the Moon


Thursday, May 30, 2013

Gloves for Cold Night Photography Work

Even in late May it can get quite cold when you're at a high elevation on a clear night, with a full moon ~ © Royce Bair

It's surprising how cold and numb your fingers can get while setting up your camera and tripod on evening photography sessions—especially on unseasonably cool nights. Even though it was late May, the high elevation (8700 feet) of this mountain lake and clear skies caused the temperature to drop to 45º F, and I was glad I had on a pair of gloves liners.

Silk glove liners
Glove liners are thin gloves that can be worn inside a regular pair of gloves. They offer extra warmth inside the heavier gloves, but their main function for photographers is to provide a few minutes of protection against the cold while your hands are outside of the heavier gloves. They are thin and flexible, so they usually offer enough dexterity to allow camera operations. For not-so-cold nights, they can even be used as stand alone gloves. I have purchased most of my glove liners through adventure/extreme sports stores, i.e. REI and Kirkham's Outdoor Products (in Salt Lake City, Utah).

Thermasilk liner gloves are the thinnest and lightest weight of the glove liners. Thermasilk is a brand of 100% real silk, one of nature's most perfect insulators. I have used non-branded silk glove liners in my photography work for over 30 years. They don't grip as well as some of the more modern materials but the are very thin, flexible, and offer an amazing amount of warmth for their light weight. (Thermasilk is also available on Amazon.)

Gordini Lavawool
Thermawool liner gloves are a little thicker, heavier, and warmer than silk. Thermawool is a brand of soft, itch-free natural Merino wool that insulates and keeps warm even when wet. (Thermawool is also available on Amazon.)

Gordini Lavawool Stretch Gripper II Glove Liners are one of my favorites. The shell is 93% polyester and 7% wool.  They are not quite as warm as the Thermawool, but they fit and grip better. Although normally wear a large glove size, but their medium fits perfectly and still offers great flexibility. They are my favorite stand-alone glove for short time periods. (Lavawool is also available on Amazon: Small or Medium to X-Large.)

Head Digital Sport Running Gloves w/Sensatec are the thickest of the liner gloves, because they are not a true glove liner. They are really designed to be worn alone, but are thin enough that they can be warn in heavier gloves or mittens as a liner. Their design produces a snug, but stretchy fit. They have a wind-resistant soft shell outer with fleece lining (53% Polyester, 41% Nylon and 6% Spandex). I particularly like their silicone grip dots on the palm and fingers. Sensatec® on the thumb and forefinger make them touch screen compatible, although I had limited success with this feature. The best pricing is at Costco (about $13). However, because this is a seasonal product, you'll often have to purchase it elsewhere during the off-seasons.

On this very cold (below zero) January night, glover liners were a MUST. As soon as camera adjustments were made, I quickly returned my hands back into the larger gloves!
Featured Post: Shooting Stars eBook Review — How to Photograph the Stars and the Moon

Wednesday, May 29, 2013

NightScape Photo Recipe

Milky Way over String Lake, Grand Teton NP. Canon 5DM2 • 15mm f/2.8 Fisheye • 30" @ f/2.8 • ISO 6400 ~ © Royce Bair

I am constantly asked to supply a simplified, step-by-step list of "ingredients" necessary to create my style of astro-landscapes (NightScapes), so here goes:

Your best photos of the Milky Way are taken without the moon present, and between 2 hours after sunset and 2 hours before sunrise.
1. Set your camera on a tripod.
2. If you have a remote release, use it. Otherwise, you can use your self-timer to set off the shutter (set it for the 2 seconds delay instead of the normal 10 seconds).
3. Turn your lens to manual focus, or shut auto focus off (otherwise the camera goes crazy trying to focus in the dark).
4. Set your focus manually to infinity. Check the accuracy by auto focusing on an infinity subject in the daytime, marking the position on the lens barrel, and returning the lens to manual focus (you can tape the position down as a precaution). You can also use your camera's "live view" function to manually focus at night on the brightest stars (enlarge the image on the LCD monitor for accuracy). Note: your camera has a one to two seconds video feedback delay (depending on the brand and model), so fine-tune the focus slowly.
5. Set your camera mode to manual (usually "M" on most cameras).
6. Select the highest ISO you have (but no higher than 6400).
7. If you have a prime wide-angle lens with a fast aperture, use it. Otherwise, zoom to the widest angle of view.
8. Set your shutter speed to 30 seconds. This is the longest exposure most cameras will give you without going to "B" for "bulb" ("B" does require a remote release).
9. Set your lens aperture ("F" stop) to the widest aperture (smallest number), which is usually f/3.5 (f/2.8 is better, but f/4 is acceptable). Here are good starting point combinations:
          f/2.8 - 30" - ISO 6400
          f/2.0 - 30" - ISO 3200
          f/1.4 - 30" - ISO 1600
          f/3.5 - 30" - ISO 6400 (-0.5 EV)*
          f/4.0 - 30" - ISO 6400 (-1.0 EV)*
          f/3.5 - 30" - ISO 3200 (-1.5 EV)*
          f/3.5 - 30" - ISO 1600 (-2.5 EV)*
*These underexposures are not optimum, but are usable by compensating in post production.
10. Set your White Balance (WB) to Tungsten or Incandescent (on most cameras this is the symbol of a light bulb, also called "indoor"). If you prefer a numeric Kelvin setting, use 3500K, 3200K or 3000K (the lower numbers will give your sky a cooler or bluer color). My favorite numeric Kelvin setting is 4000K. I believe this produces a more natural sky that is still cool, but not quite as blue. This also works well when mixed with 3200K light painted foregrounds. Some people prefer an Auto or Average (AWB) white balance setting if they have a lot of post processing experience. Auto or Average will give you a dark gray colored sky (you can change this to a more colorful sky in post production using Photoshop, Adobe Elements, or Lightroom).
11. Frame the Milky Way or several interesting star constellations, (try to silhouette an interesting foreground subject) and take your shot. Light painting the foreground can add even more interest to the composition.
12. Composing in the dark can be difficult. If you have an ISO higher than 6400, use it to shorten your exposure times so you can review your composition on the LCD monitor much quicker. Be sure to return to the lower ISOs (6400 or lower) for your final exposures.
13. Fine tuning your exposure: The more light pollution (from artificial lights or the moon), the more you can reduce your exposure by lowering the ISO (one stop or more).
14. Fine tuning your image: You'll notice that 30-second exposures will have some star trailing (blurring) when the images are enlarged, unless you are using an ultra-wide angle lens (i.e. 114º or wider). You can eliminate this slight blurring by reducing your exposure time to 15 seconds (and compensate with wider apertures or higher ISOs). This technique is a simplified version of the "600" or "450" rule.
For hands-on instruction, visit my workshop page on Meetup.com.

Featured Post: Shooting Stars eBook Review — How to Photograph the Stars and the Moon

Friday, May 24, 2013

Adding Ballast to Stabilize Your Tripod

My tripod stabilized with a heavy bag of rocks during a time-lapse series.
Use the heaviest tripod you can stand to carry: Many wildlife photographers recommend that if a person wants sharp photos when using a long telephoto lens, one should buy the heaviest tripod that he or she can stand to carry into the field. Although nightscape photographers typically use wide angle rather than telephoto lenses to capture the night skies, the need for a stable tripod is still there, especially when multiple exposures are required.

Or, add the extra weight once you're on location: One way to get the stability of a heavy tripod is the add the weight or ballast after you get to your location. Ballast is often defined as the heavy material that is placed in the hold of a ship to enhance stability. In my night photography, this ballast comes in the form of a canvas shopping bag that is partially filled with rocks (gathered on location) and hung from the bottom center of the tripod.

The day or night solution to sharp images: I often use this same technique for my daytime photography. The new light-weight carbon fiber tripods are very sturdy, but I've discovered that even a medium breeze can sometimes shake my camera and blur my images. Adding ballast in the field offers a win-win solution!

In the night scene below I captured the Grand Canyon and the Colorado River bathed by the light of a quarter moon. Six hours later, after the moon had set, I was able to capture the glory of the Milky Way. Because the weighted tripod remain perfectly stable between the two exposures, combining these two images was fairly easy in post production.

Grand Canyon and the Colorado River bathed by moonlight ~ © Royce Bair
6 hours later, with the moon gone, I can now capture the glory of the Milky Way ~ © Royce Bair
In post production, I easily combined the two exposures because of perfect alignment, due to a stable tripod.
Equipment Used: For the above photos, I used the Canon EOS 5D Mark III camera body with a Rokinon 14mm f/2.8 lens. The 5D Mark III provides excellent low-noise control at the high ISOs I need for this type of starry night photography, and the ultra-wide (114º) Rokinon lens provides excellent coma aberration correction. The camera was mounted to a Manfrotto 410 Junior Geared Head, attached to a light-weight Manfrotto 190CXPRO3 3-Section Carbon Fiber Tripod (weighted down with my canvas bag of rocks). You can read about the benefits of using a geared head here.

When I am on unstable soil, i.e. sand, I also take the precaution of placing flat rock supports under my tripod legs so there is less chance of shifting between exposures. (During the night, wind gusts reached over 40 mph, so I was glad that the tripod had been weighted with the bag of rocks!)

Flat rocks under the tripod legs provide added support when on unstable soil, i.e. sand.

Wednesday, May 22, 2013

How to Level Your Camera in the Dark

You're hoping to capture a Milky Way landscape (left), but you'll be lucky to see even this much (right) in the viewfinder!
If you've taken the proper steps to adjust your eyes to the darkness and preserve your night vision, you might be able to see as clearly as the image on the right. Even then, the image through your camera's viewfinder is usually much dimmer.

Staying Level-headed at Night. There are so many simple things that we do in the light of the day that become much more difficult in the darkness of night. The first time I went to photograph a Milky Way landscape, I realized I could not see the horizon in my viewfinder. In fact, there were hardly any reference points I could see through the lens! I had to photograph the scene several times, review it on the LCD monitor, and make small adjustments to the tripod head just to get a general composition that I liked. After all this, I still wasn't sure if the horizon line was really level. When I check the final composition later on my computer monitor, I discovered that I needed to make a 5-degree leveling adjustment that cropped away some of the important areas of the image.

Nikon's "Virtual Horizon"
Electronic Leveling in the Camera: As early as 2008 Nikon began to offer Virtual Horizon on select DSLR models. VH is a feature used to verify that the camera is horizontally or vertically level. It appears that the Nikon D800 has a version of VH that now displays both tilt and roll. (I was unable to determine from Nikon's website which camera models have the Virtual Horizon feature and the newer version which displays two axis leveling.)

Canon was the first camera company to provide internal Dual Axis Electronic Level with the introduction of the Canon EOS 7D in October 2009. Dual Axis provides roll and pitch information within an accuracy of 1-degree. This information can be displayed on the rear LCD monitor or within the viewfinder. Dual Axis is now available on the Canon 5D Mark III and the Canon 1D X. Canon provides Single Axis Electronic Level with the EOS 6D and the EOS 60D.

Vello 2-Axis Bubble Level
External Bubble Levels: Even though both of my Canon cameras have internal electronic leveling, I often find myself using an old-fashioned bubble level attached to my camera's hot shoe when I am doing night photography. Maybe it's my construction background, but I can center a bubble faster than I can switch on the electronic leveling feature and align it in the viewfinder or on the LCD monitor! And for those of you with cameras not having an electronic leveling feature, a hot shoe bubble level is a must when working in the dark. I use the Vello Two-Axis Hot-Shoe Bubble Level. I also have the Manfrotto 337 2-Axis Flash Hot Shoe Double Bubble Level, which I bought at a local camera store when I temporarily misplaced my Vello. I paid more than twice as much for the Manfrotto as the Vello (about $37 vs. $18), and I can't see any difference in quality or accuracy. (Read my final paragraph, "Tripod Head Workflow", for suggestions on how to use this level.)

When shooting a horizontal subject, you attach the bubble level to your hot shoe in the manner.
When shooting in the vertical position, you attach the bubble level in this manner  ~ © Royce Bair
Manfrotto 410 Junior Geared Head
Making Adjustments for Composition with a Geared Head: If you are an occasional nightscape photographer, a standard tripod head will work just fine for you. As I have already mentioned in the beginning, there will be some frustrations in trying to compose your image in the dark because the viewfinder offers almost no feedback. This is why some astro-landscape shooters, like myself, have gone to using geared heads. A geared head not only gives your reference markings, but allows smooth and exact movements to those points.

Pan, Pitch, and Roll: Like an airplane, almost all tripod heads allow you to pan (yaw) left or right, tilt (pitch) up or down, and roll (lean) to the left or right (taking a vertical photograph requires a 90º roll to the left or right). A geared head will allow you to do the same things, but with precision and repeatability. When you make an adjustment with a regular tripod, you are just "shooting in the dark". As soon as you loosen the adjustments for any of your three axes, you have no reference for your movements. With a geared head, you can make an exact adjustment in any of the three axes. If you overshoot or undershoot your mark, you can go back or forward a few degrees.

The head I use is the Manfrotto 410 Junior Geared Head (one of my fellow nightscape photographers, Lincoln Harrison, uses the heftier Manfrotto 405 Pro Digital Geared Head). I also use a ball head (Manfrotto 496RC2 Compact Ball Head) between the camera and the geared head to extend the range of movement when I'm doing vertical shots. My tripod is the Manfrotto 190CXPRO3 3-Section Carbon Fiber Tripod.

Tripod Head Workflow: Whether you're using a regular tripod head or a geared one like mine, 1.) I always strive to null out the head (return any settings to zero, if it has markings) and level it if it has a bubble level. When the camera is attached to the head, its hot shoe bubble level should now read level as well. 2.) I then pan the head and re-check the hot shoe level throughout the pan, making any necessary fine-tune adjustments to the tripod to maintain a level pan (if you are taking a panoramic series of photographs to stitch together, this step is critical for best results). 3.) I then aim the camera in the general direction of nightscape subject and take a photograph (you can speed up these composition test exposures by using a higher ISO). 4.) After reviewing the image on the LCD monitor, I make further head adjustments until I am satisfied with the composition. 5.) I re-check my hot shoe bubble level one last time and make any "roll" level adjustments (if necessary) before making my final exposure.

Thursday, May 16, 2013

Improving Your Outdoor Night Flash Photography

Using off-camera or bounce flash can improve your outdoor night photos ~ © Royce Bair (click for  specs)
Portable Flashes vs. Built-in Camera Flashes: Although built-in camera flashes are convenient, they are not only limited in power, but more importantly in movement. Unlike a separate flash unit, their output cannot be redirected or aimed somewhere else, or moved away from the camera! Being able to make adjustments to your portable, camera-mounted flash can greatly improve the quality of your outdoor night photographs.

Canon Speedlite 430EX II
What I use: For under $300, I have the Canon Speedlite 430EX II. It's fully compatible with Canon's E-TTL automated flash exposure system, as well as offering adjustable manual power output down to 1/64 power. The flash head can be moved up and to the right 90º, and to the left 180º. On the Nikon side, I recommend the Nikon SB-700 AF Speedlight, or their more versatile, Nikon SB-910 AF Speedlight.

Getting the light source away from the camera: The unnatural part about most flash photography is that the light source is typically coming from the same direction as the camera's lens! Moving the light source away from your camera will improve almost any photo.

Bounce or extension: The moveable flash head allows me to bounce the flash off of ceilings and walls when I'm indoor, or off rocks, cliffs, and trees when I'm outdoors (see last the paragraph for an explanation). If the right object for bouncing is not available, I often hold the flash at arm's length (or have someone else hold it) using Canon's OC-E3 Off Camera Shoe Cord. That two or three feet extension can make a huge difference in the look of your flash photos.

For greater distances, I use another Canon flash (i.e. the more versatile Canon Speedlite 600EX-RT) to trigger the one doing the main lighting (you can set lighting ratios with the Canon Speedlites), or I can use the PocketWizard Plus X Transceiver to trigger a more distant flash. The key is get the light source away from the camera and at an angle that lights the subject in a more natural and pleasant way.

Dining under a red granite cliff
Compare the difference: This was the scene at an early evening meal, under a red granite cliff in the Grand Canyon. After dinner we had a campfire, and I made this on-camera flash exposure (below) with the Canon Speedlite 430EX). I programmed the shutter speed and f-stop so they would mix and balance correctly with the light output of the fire. The problem with this system is that the direction of light is unnatural, as it is always coming from the camera, and the fall-off is very fast (especially when using a wide angle lens—causing the foregrounds to always be over lighted and washed out).

Straight-on flash with Speedlite 430EX
The difference between this photo and the one at the top is the direction and quality of the light. The light in the top photo is no longer coming from the same direction as the camera. In the top photo, the adjustable flash head has been rotated and turned so that its light is bouncing off the granite cliff behind me (the bounced light is coming from above and from my left, helping to match the direction of fire's light). Normally, I would also cover the flash head with a warming gel to match the warm color of the fire, but in this case the red color of the granite has already done that for me! Bouncing off a dark granite wall greatly reduces the flash's output to the scene, so most of my shots had to have an ISO boost to 1600 or 3200. Although this is abnormally high ISO for flash photography, the excellent noise control of the Canon 5D Mark III is well-equipped to handle it!

The gels I use are made by Rosco, and the Rosco Strobist 55-Piece Filter Kit is an easy way to change the color of the light or match the ambient light, such as in the campfire situation. When I bounce my strobe off of an overhanging tree that has green leaves, I can put a complimentary shade of magenta over the flash to bring the white balance back to normal.

These 1.5"x3.25" sheets work perfectly to cover most portable flash heads, but for my larger lights (or where I need to cover several lights with the same color), I use the larger 20"x24" Rosco sheets.

Delicate Arch - lighted with two filtered lights, one w/o ~ © Royce Bair (click for more info)

Wednesday, May 15, 2013

Time-Lapse Earth ~ Edited by Bruce W. Berry

Milky Way stars and lightning storms over Africa (click any image to see video)
Sarychev Volcano

Get ready to be dazzled by the Earth's night show! All of these images were taken by astronauts onboard the International Space Station. (The ISS orbits our planet about once every 90 minutes and is about 350 Km / 217 miles above the earth.) Many of the images were shot at one frame per second. While this image of the Sarychev Volcano and one other scene was shot in the daytime, all other scenes in this clip were photographed at night. There are images of the Aurora Borealis, moonglow, city lights, stars, and lightning storms. The yellow/greenish line you see above the earth (in the photos below) is Airglow.

Video "Time-lapse EARTH": Although all the time-lapse sequences were taken by the astronauts, and made available for public use, we owe this unique edited compilation to Bruce W. Berry. Berry took all the footage and color graded it, de-noised, de-flickered, slowed it down, and stabilized it into what you see on this video clip. The music for this video is "Manhatta", composed & performed by The Cinematic Orchestra. Here are other frames from this short (4:08) movie:


Friday, May 10, 2013

Preserving Your Starry Night Vision

Red LED headlamps and flashlights help preserve your night vision while you find, compose, and photograph your astro-landscapes.

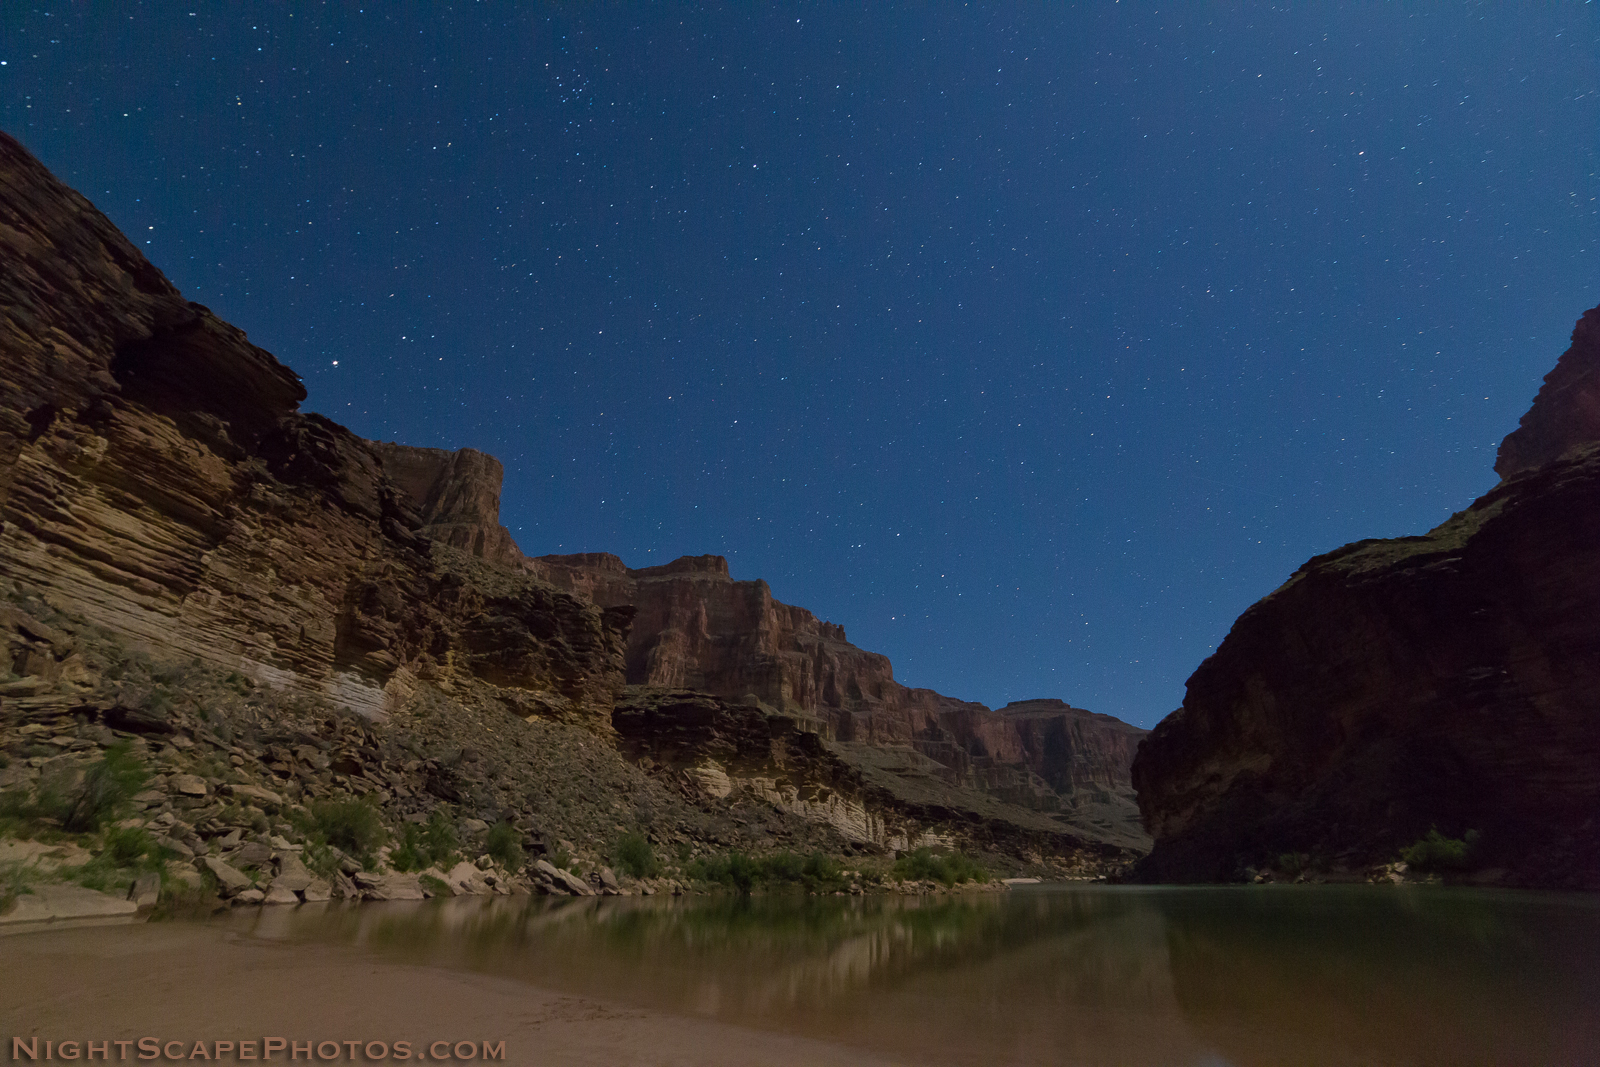
It can take 30 minutes or more for your night vision to return after using bright lights ~ © Royce Bair
Using red lights in your photo equipment set-up will help in your night vision recovery (self-portrait)
"White" LEDs
I have found it necessary in my 'NightScape' work to have a headlamp or flashlight that has both a powerful white light and a dimmer red light. They should have a strong white light that will help you find your way to the shooting location, and a red light for helping you set up your tripod and adjust your camera while your eyes re-adjust to the darkness. It can often take as much as 30 minutes for you to get your "night vision" and clearly see the Milky Way after having been exposed to bright lights, especially in the blue-cyan wavelengths—which are most common with today's LED lights.

Using a red light will help to not only help preserve your night vision, but shorten the recovery time once you turn off the bright white lights. It is also good etiquette to use a red light when in a group setting, such as a workshop. Recent studies have indicated that intensity is just as important as the color of the light, so having a low-intensity or dimmable red light is also important.

Too many choices?
Choosing the right headlamp: Headlamps have become increasing popular in the past few years with hikers and other outdoor enthusiasts because they allow for hands-free use. LED headlamps are much more efficient than earlier tungsten lamps. They produce more lumens, burn much longer on even smaller batteries, and have "lightbulbs" that almost never need replacing. A few years ago, there were only a handful of companies making headlamps. Now there are scores of brands, with many models from each. Finding the right headlamp for night photography use can be a little confusing. When you limit your choices only to those that also have a red light, the field narrows considerably. However, to make it even simpler, I'm going to review just two brands—one that is a leader in the field (Petzl), and the other is a general, consumer product (Energizer 7 LED), available almost anywhere.

Petzl is company that has lead the way in quality and innovations. This French company is a world leader in the design and manufacture of vertical sports equipment (i.e mountaineering, climbing, work-at-height, and rescue), and headlamps. In this review, I will concentrate on only three headlamps in their Universal Series. These units are available at REI, LL Bean, BackCountry.com, GearCoop.com and Amazon.com.

Also available in black
Petzl Tikka XP 2 Headlamp (about $55 at REI). A single high-output LED provides even, white lighting. Advanced optics optimize the reach of the beam to 68 meters. A red LED positioned to the side of the white LED lets you preserve your night vision. One push-button is used to toggle through lighting modes and two colors. The headlamp tilts to point the light where needed. Three white lighting modes: maximum (80 lumens @ 70 hours), economic (13 lumens @ 190 hours) and strobe. Two red lighting modes: maximum (unpublished lumens @ 100 hours) and strobe. You can choose between wide or focused beams with a flip-up Wide Angle diffuser lens. Battery charge indicator light comes on @ 50% remaining power. Uses 3 AAA alkaline batteries (included). You can also purchase the optional CORE system lithium rechargeable battery (about $28 at Amazon) or purchase the Petzl Tikka XP 2 Core Headlamp (about $72 at Amazon). The Petzl Accu lithium battery is rechargeable up to 300 times, making it equivalent to 900 AAA alkaline batteries (the lithium battery is also operational in extreme temperatures from -40° to 140°F).  PROS: Powerful and efficient light/optics, with lots of advanced features and adaptability. Red LED is dim enough to preserve your night vision. CONS: Expensive. You must toggle through the lighting modes to get to the one (and color) you want, which could be somewhat blinding to yourself and annoying to others (although the Petzl Tikka XP 2 Core Headlamp does have a memory feature where the last color used remains in memory for the next use).

Also available in black
Petzl Tikka Plus 2 Headlamp (about $38 at Amazon). This headlamp is almost identical to the Tikka XP 2, except that it does NOT have the flip-up Wide Angle diffuser lens to change the beams between wide and focused; and it's power is slightly less: Advanced optics optimize the reach of the beam to 40m (vs. 68m for the XP 2). It's maximum white beam delivers 70 lumens vs. 80 lumens (@ 58 hours vs. 70 hours). It's economic mode delivers 10.5 lumens vs. 13 lumens (@ 185 hours vs. 190 hours). The red LED is still rated at 100 hours. You're going to save about $15 over the XP 2, but you'll lose a little power and efficiency; and the use of a wide Angle diffuser lens. Other than that, the pros and cons are still the same.

Also available in black
Petzel Tactikka Plus Headlamp (about $41 at Amazon). This headlamp uses an older, 4-LED design with 4 lighting modes (via a single button) and a red flip filter to change lighting color. Maximum light output is 35 lumens @ 100 hours, with a maximum beam reach of 32 meters. It has 3 other modes: Optimum (23m beam reach @ 120 hours), Economic (15m beam reach @ 150 hours) and strobe. Headlamp tilts to point light where needed. Uses 3 AAA alkaline batteries, which are included (it is not compatible with the CORE lithium system). PROS: The red polycarbonate flip filter allows quick change between white and red lighting, and therefore gives the red lighting all the economic modes and dimmable benefits! CONS: The low-tech design is not as powerful or as adaptable as the more advanced Tikka series, and it has only one beam pattern: wide. Despite this, it is a very durable product with run time specs that are high for its class.

20" spot circle @ 6 ft.
Energizer 7 LED Headlight (about $16 at Amazon). The Energizer pivots to aim light where needed. It uses seven LEDs and a push button switch to offer 4 light modes: spot (3 white LEDs with 21 hours of run time), flood (2 white LEDs with with 30 hours of run time), spot+flood (5 white LEDs with 16 hours of run time @ a maximum of 45 lumens), and red night vision (2 red LEDs with 30 hours of run time). The light patterns from these four modes are displayed here to the left (I took all photos from the same distance, with the same exposure, and white balance). It is powered by 3 AAA batteries (included). My measurements rate the two red LEDs at about 5 lumens, which is dim enough to protect your night vision. Note: Energizer may be in the process of updating this product, as some package specs have the white "area" (spot+flood) rated at 58 lumens, with a light beam reach of 30 meters, and a battery run time of 14 hours. PROS: You get quite a bit of power and options for your money, and the product is available almost everywhere sporting equipment and home improvement products are sold. If you are just an occasional night photographer, this would be my first choice. CONS: Like the Petzl Tikka models, you must toggle through the lighting modes to get to the red night vision mode. This requires you to shield your eyes, or the headlight from others standing near by as you click through all three white settings. I found the soft plastic lenses that cover the LEDs and focus the beams are easily scratched over time (if allowed to rattle around in your pocket or camera bag with hard objects) and can cloud and distort the beams. I'd suggest making a protective bag out of an old pair of socks (cut off the top part if the sock is too long). The plastic lenses also allow some stray light to glare into the eyes of people who are standing to the side of you (a little annoying at times for them).

Maximum Battery Life or Run Time: I think it's important to mention that these times are for total length of output, or until the battery is exhausted, and the LED fails to produce usable light. I typically will replace my alkaline batteries long before this time—usually halfway into the manufacturer's maximum number of run time hours. This is because alkaline batteries have a gradual decline in performance over time, and by the halfway mark I'm not getting enough light to satisfy my needs. For this reason, I always carry three extra AAA batteries in my camera bag. Petzl users who opt for the CORE system lithium rechargeable battery or who purchase the Petzl Tikka XP 2 Core will not experience the gradual decline in battery performance, as the lithium can be programmed (via the Petzl OS software) to run at peak output until the battery is exhausted—which is why I still carry the three extra alkaline batteries (as the Petzl Tikka series can switch back and forth from lithium to alkaline).

My Conclusion: I liked the Petzl Tikka XP 2 for its high-tech adaptability, its power, longevity, proper red LED output. However, most people don't want to pay this much for a headlamp unless they use it a lot. For those who are medium users, I would recommend the Petzel Tactikka Plus because it had the most control over the red night vision light (three different brightness settings and the most hassle-free way to change from white to red), and it still had decent white light power and longevity. It's biggest drawback for me was that it does not have a focused beam (spot) capability to reach out way ahead of me on the trails. However, for general use it is a great light. The Energizer 7 LED came in as a close second because of its many features and low price (the Energizer would be my first choice for the occasional night photographer).

How I work at Night: I use both a headlamp and a handheld flashlight. Because I like a lot of far-reaching power on my headlamp, with a long run time, and the ability to use lithium for cold winter photo shots, I use the Petzl Tikka XP 2 Core. As I near the end of a long hike, become comfortable with my surroundings, and start setting up my photo equipment, I switch to the red light. As I continue to make adjustments, or wait for weather conditions to change (especially when working around others), I sometimes will shut off the headlamp and switch to a low-power, handheld LED flashlight. Although it is not as convenient as a headlamp, a handheld flashlight offers more control.

My Red LED Flashlight: Smith & Wesson Galaxy 6 LED Flashlight (about $21 at Amazon) is a dual switch flashlight that utilizes two separate on-off push buttons, giving me a clear choice between the 3 White LED mode (12 lumens) and the 3 Red LED mode (5 lumens), without the confusion and safety hazards of a single switch mechanism. The shatterproof LED diodes last over 110,000 hours, and should never need replacing. The flashlight's length/diameter is 7"/1" and weighs 6 oz. with 2 AA batteries (included), providing a run time of 80 hours. The light is constructed of precision machined 6063 anodized aluminum, and includes a nylon holster. Some of my aviation associates had first brought this flashlight to my attention. They use the red light mode to check their maps while flying at night.

Tuesday, May 7, 2013

Australian Night Skies by Lincoln Harrison

The Pinnacles, Phillip Island VIC ~ © Lincoln Harrison - "The best location I've ever seen."
Some purist have criticize Lincoln Harrison for being "too colorful", but he continues to do things his way. Making his starry night Australian landscapes look "accurate" is not as important to Lincoln as it is to make it "…look as good as it can." The popularity of his images would indicate that most agree with Lincoln's point of view.

Lincoln, 37, is a self-taught photographer from Bendigo, Australia. Prior to photography, he spent most of my spare time racing off-road motorcycles. He's only been doing photography for the past two and a half years, when he bought his first DSLR to take shots of some ebay items. Somewhere along the way Lincoln got hooked on landscape and night photography, star trails in particular. "I was working nightshift when I got my first camera, so on my days off there wouldn't be much daylight left by the time I got out of bed. There's not much else to photograph around here at night other than the stars."

Apart from getting a nice image to hang on his wall, Lincoln enjoys the process of taking the shots, and being at nice locations under a starry sky. "I try to come up with new ideas and techniques rather than keep churning out different versions of the same basic image."

"Forgotten" - Old barn, Mitiamo VIC ~ © Lincoln Harrison (click to see larger)
"I've done a lot of milky way shots but this was the first time under a very dark sky. I drove around all day looking for a suitable foreground. I gave up and started heading home, and then I saw this old barn."

"Noctis" - Lighthouse, Cape Schanck, VIC ~ © Lincoln Harrison (click to see larger)
"I tried to get this shot three or four times, but the seas were always too fierce to venture down to the rocks at the bottom of the cliff.  I forgot to take my torch with me, and had to climb back up in the dark. I tumbled down the cliff a few times, [but] finally made it to the top after about 2 hours, covered in cuts and bruises."

Lincoln's biggest challenges come from the weather. "Quite often I'll drive for hours with clear skies the whole way, [and] ten minutes before I arrive at my location, the clouds roll in." On the 'Pinnacle' photo,  he was very lucky with the conditions, but for every other time he's been there it has rained non-stop!

"Fusion" - Dead Tree, Ravenswood VIC ~ © Lincoln Harrison (click to see larger)
"This location is a ten minute drive from home. I shoot there a lot. I love that tree. This was a test shoot when I got the D800E. It ended up hanging on my wall 50 inches wide."

Lincoln's Cannot-Do-Without Equipment List:

Lincoln's Most Valuable Tools, Apps, and Software:

"Bib Bang" - Dead Tree, Ravenswood VIC ~ © Lincoln Harrison (click to see larger)
"I was doing some light painting tests at my favorite tree when I came up with this idea. Who says primes are better than zooms?"

More of Lincoln Harrison's work can be seen at his 500px page.